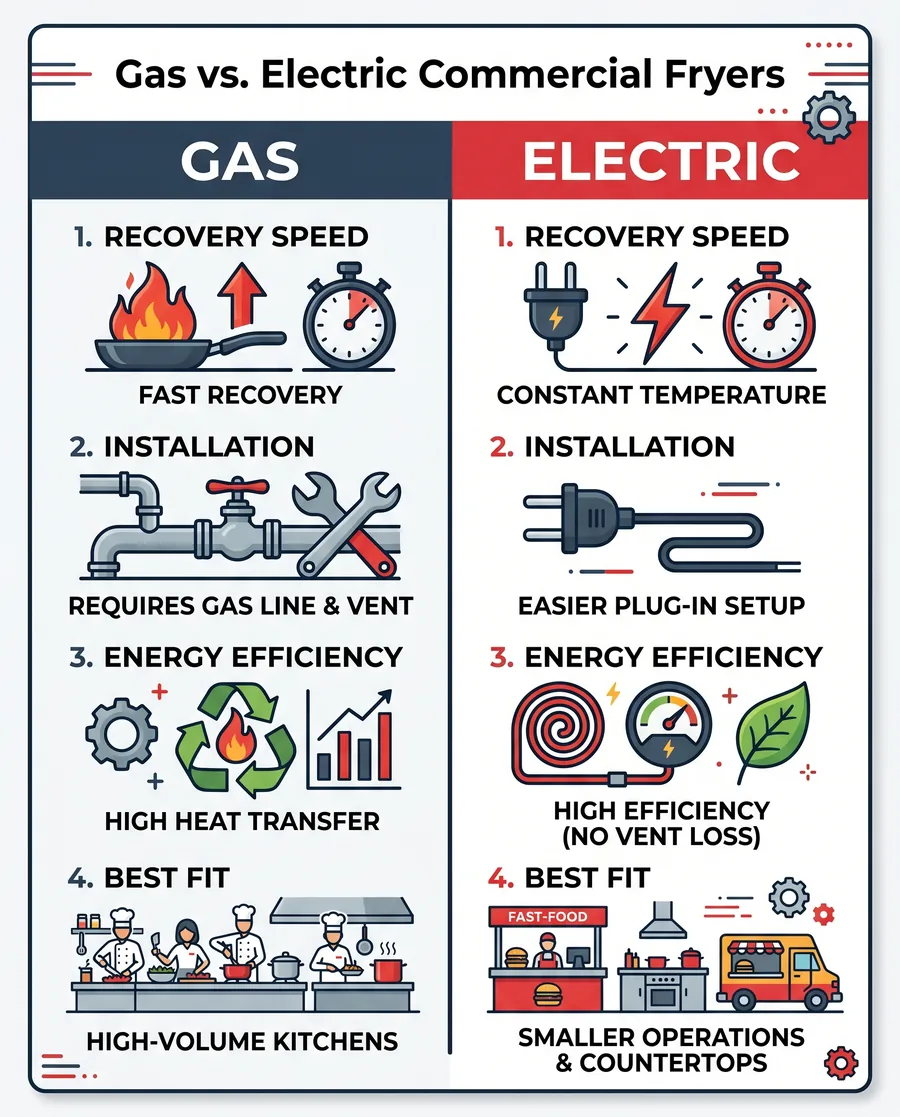
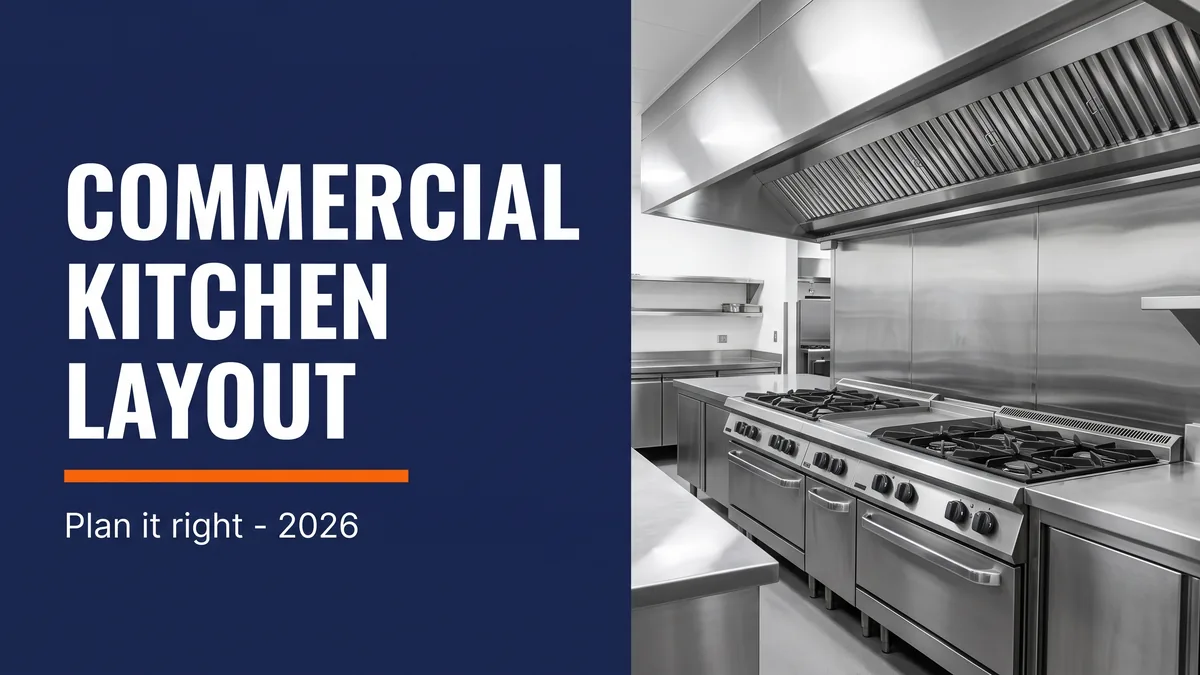
Commercial kitchen layout planning guide, stainless steel cooking line

How to Plan a Commercial Kitchen Equipment Layout in 2026


Here is the mistake that costs new restaurants the most money: they start by picking the biggest, flashiest equipment they can afford, then try to cram it into the room they have. A great kitchen is not about the biggest ranges or the most burners. It is about flow. The best commercial kitchen layout moves food and people in one smooth direction, from the back door to the pass, with no crossing paths and no wasted steps. Get the arrangement right and a modest lineup of commercial kitchen equipment will out-cook a crowded room full of premium gear.

This guide walks through planning a fixed, bricks-and-mortar kitchen the way a designer would: menu first, then zones, then flow, then the equipment sizing, ventilation, and code clearances that make it all legal and safe. Work through it in order and you will end up with a room that runs a service without anyone bumping elbows over a hot fryer.

Your menu is the blueprint. Every piece of equipment, every zone, and every square foot should trace back to a dish you plan to sell. Before you price a single range, write out your full menu and mark what each item needs: fryer, flat-top, oven, cold prep, or a combination.

  • List every dish and its cooking method. Grill, fry, saute, bake, cold assembly. Count how many items lean on each.
  • Find your bottleneck stations. If two thirds of the menu goes through the fryer, one fryer will not survive a Friday rush.
  • Separate hot from cold. Salads and desserts need their own cold prep space away from the heat of the line.
  • Plan for prep volume. A scratch kitchen needs far more prep bench and storage than a reheat-and-plate concept.

Once the menu tells you which cooking methods dominate, you know which zone carries the load and where to spend your budget. Skip this step and you end up buying equipment you rarely use while your busiest station chokes.
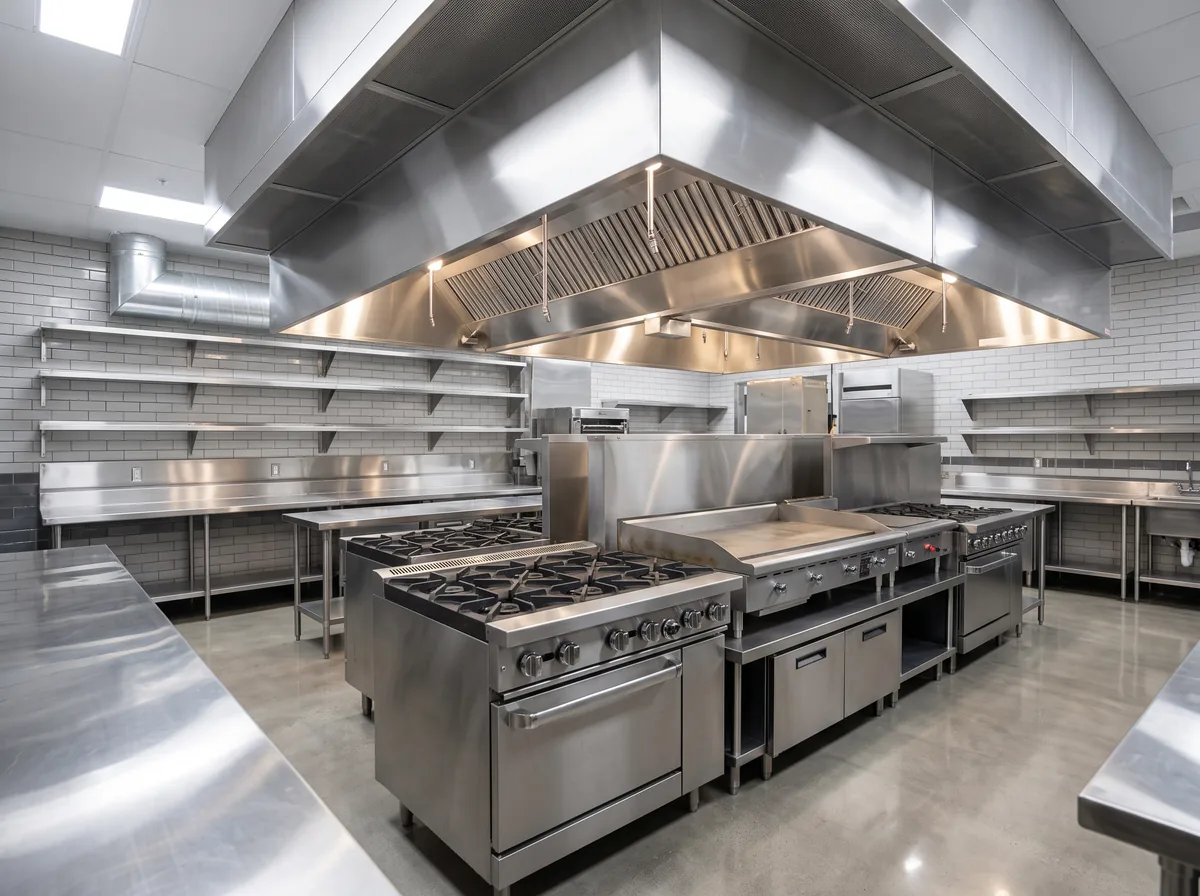
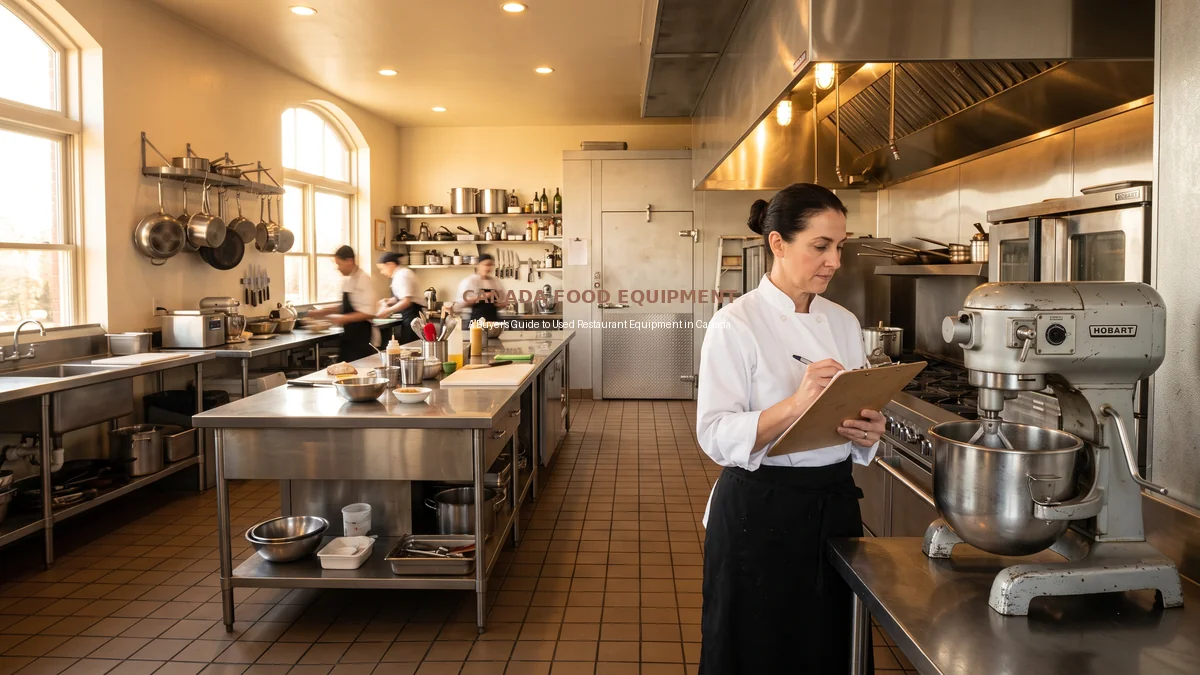
Clean stainless steel commercial kitchen cooking line with ranges and exhaust hood

The five zones of a commercial kitchen layout

Almost every professional kitchen, from a small cafe to a full restaurant, is built from the same five work zones. Define them on paper first, then decide where each one sits in your actual room. The goal is to keep each zone self-contained so a cook never has to leave their station mid-task.

Zone Purpose Key equipment
Receiving & storage Take deliveries, store dry/cold Shelving, walk-in cooler, freezer
Prep Wash, cut, portion Prep tables, sinks, slicers, food processors
Cooking line Cook to order Ranges, fryers, ovens, griddles under a hood
Plating & service Assemble and pass Heated wells, pass shelf, expo counter
Warewashing Clean and sanitize Dishwasher, 3-compartment sink, drying racks

Notice the order. It mirrors the path a single ingredient takes through the building: it arrives at receiving, moves to prep, hits the cooking line, gets plated at the pass, and the dirty dishes come back to warewashing. Lay the zones out in that sequence and the flow almost designs itself.

Pro tip

Give warewashing its own corner near the exit path, not next to your cold prep. Splashing, steam, and dirty-dish traffic are the enemy of a clean prep station. A short run of dishwashing tucked by the back door keeps contamination and clutter away from where food is handled.
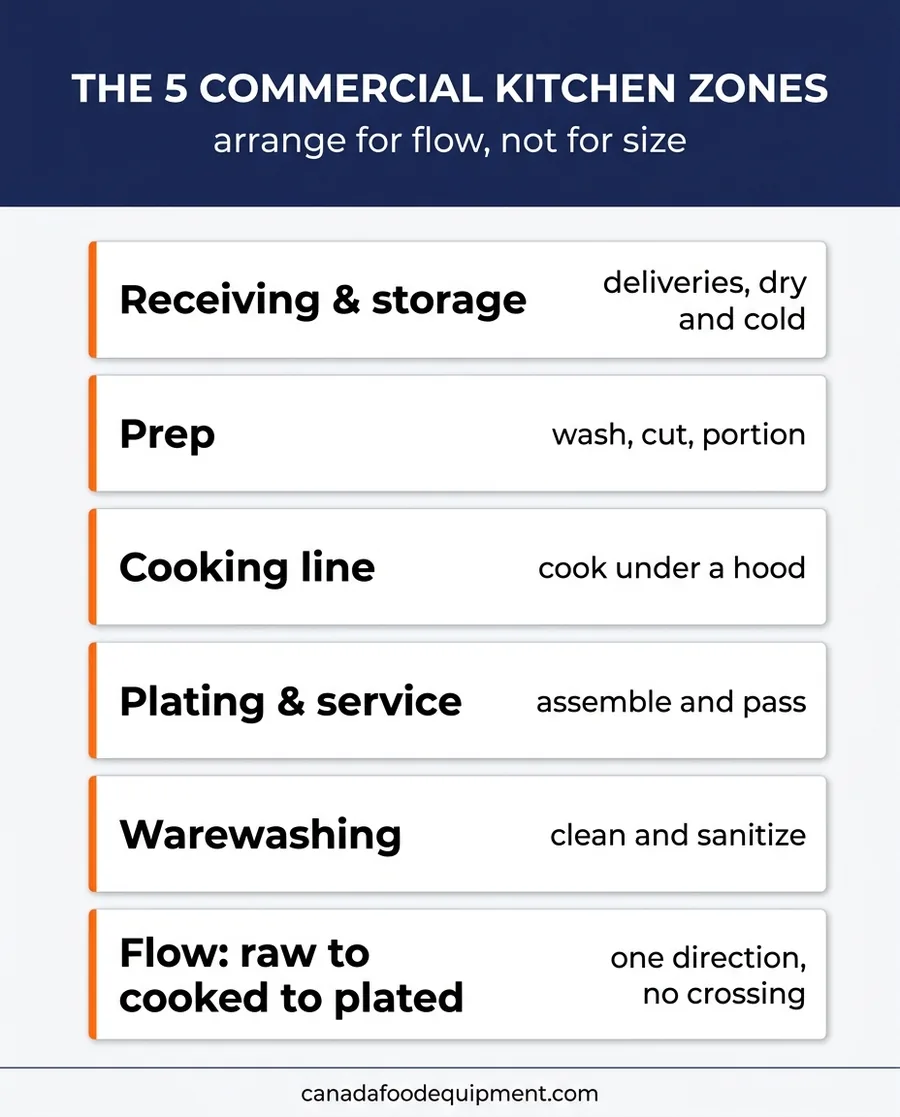
Infographic showing the five commercial kitchen zones and flow

Plan the flow: raw to cooked to plated

Workflow is the difference between a kitchen that hums and one that jams. The principle is simple: food should move in one direction and never double back. Raw goods come in the back, get prepped, get cooked, get plated, and go out to the dining room. Clean and dirty should never cross.

  1. Trace one dish end to end. Walk your busiest plate from the walk-in to the pass and mark every stop. Each hand-off should be a step forward, not a lap around the room.
  2. Keep the line tight. A cook on the hot line should reach the fridge, the range, and the plate-up shelf without walking. Steps per plate add up fast over a service.
  3. Protect the aisles. Leave at least a metre of clear aisle behind the cooking line so staff can pass a working cook without a collision or a burn.
  4. Separate the dirty return. Route used dishes back to warewashing along a path that does not run through prep or plating.

Did you know?

The classic layouts each solve flow a different way. An assembly-line setup suits high-volume, repeatable menus like pizza or burgers. An island layout puts cooking in the centre for a bigger, varied menu. A zone layout, the five zones above, works for most full-service restaurants. Pick the shape that matches how your menu actually moves, not the one that looks best on a floor plan.

Size your equipment to real volume

Now the equipment. The trap here is buying for a fantasy rush you will not see for two years, or buying too small and stranding your line on opening night. Size to the covers you realistically expect in your first year, with a little headroom, not to your dream numbers.

  • Match capacity to peak covers. Count how many plates leave each station at your busiest hour, not your daily average.
  • Right-size cold storage. A walk-in cooler that is slightly too big costs a bit more to run; one that is too small forces daily deliveries and risks spoilage.
  • Think in footprints. Every unit needs its own space plus clearance for doors, drawers, and service access. Measure the room before you buy, not after.
  • Leave room to grow. Plan one open slot on the line for the piece you will add when the menu expands.

If cash flow is tight, financing the core line lets you buy the right-sized equipment now instead of undersized gear you will replace in a year. Canada Food Equipment offers equipment financing options so a new kitchen can open fully kitted out. Not sure which range or fryer fits your volume? Our team can spec it against your menu at the Ottawa supply store.
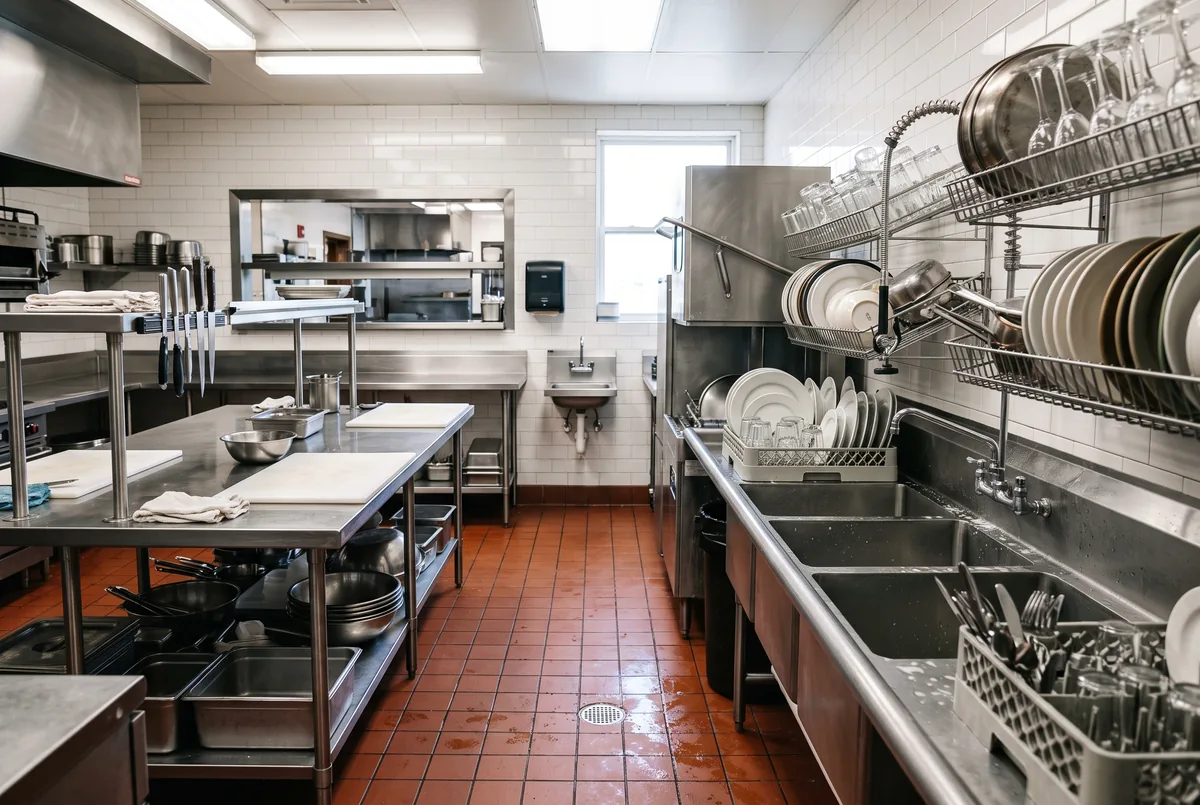
Commercial kitchen prep tables and three-compartment warewashing sink

Ventilation, utilities, and the exhaust hood

Ventilation is where do-it-yourself layouts fall apart, because the hood is not optional and it is not cheap to move later. Any equipment that produces grease-laden vapour, ranges, fryers, griddles, char-broilers, has to sit under a Type I exhaust hood. Plan the hood and the cooking line together, as one block, from the very start.

  1. Group heat under one hood. Cluster the ranges, fryers, and griddles so a single hood covers them. Scattered cooking equipment means multiple hoods and multiple headaches.
  2. Balance exhaust with make-up air. A hood that pulls air out needs fresh air coming back in, or your kitchen goes negative and doors slam.
  3. Map your utilities early. Gas lines, 208/240V circuits, hot water, and floor drains all have to reach the right zone. Rough them in before the equipment lands.
  4. Build in fire suppression. Commercial hoods need a suppression system, and the standards for kitchen exhaust are set out by fire authorities.

Kitchen exhaust and fire-suppression standards in Canada follow the guidance published by the fire protection association, and your local authority will inspect against them. Do not treat ventilation as an afterthought; it drives where your entire cooking line can go.

Code clearances and food-safety rules

A layout that flows beautifully is worthless if it fails inspection. Health and fire codes set hard rules on spacing, sinks, and surfaces, and they vary by province and municipality. Confirm the specifics for your location before you commit a floor plan.

  • Hand sinks within reach. Every food-handling zone needs a dedicated hand-wash sink, separate from prep and warewashing sinks.
  • The right sinks for the job. Most kitchens need a three-compartment warewashing sink plus a separate prep sink and hand sink.
  • Clearances around equipment. Codes and manufacturers require minimum gaps for cleaning, airflow, and combustion. Do not push units wall to wall.
  • Cleanable surfaces everywhere. Floors, walls, and ceilings in food zones must be smooth, non-porous, and washable.

Provincial food-premises regulations spell out the sink, surface, and layout requirements in detail. In Ontario, for example, the rules live in the provincial food premises regulation. Read the version for your province, and have your local public health and fire inspectors review the plan before construction, not after.

Budget ranges and what to do next

Equipment is one of the biggest line items in any build-out, and the range is wide because it depends entirely on your menu, volume, and whether you buy new or used. Use these figures as a starting frame, not a quote.

Kitchen type Rough equipment fit-out (2026)
Small cafe or coffee shop $25,000 to $60,000
Quick-service or takeout kitchen $50,000 to $120,000
Full-service restaurant line $100,000 to $250,000
Large or high-volume kitchen $250,000 and up

These ranges are broad estimates for equipment only, based on typical 2026 Canadian market rates, and exclude construction, ventilation installation, permits, and smallwares. Your actual cost depends on menu, kitchen size, new versus used equipment, and local pricing. Always get a written quote before buying. Canada Food Equipment does not guarantee any specific price.

Save your money

You do not have to buy every zone brand new. Stainless steel work tables, shelving, and sinks barely wear out, so buying them used frees up budget for the equipment that matters, your cooking line and refrigeration. Put your money where the heat and the food safety are, and browse the rest at the online equipment store.

When your layout is drawn and your budget is set, here is what to do next:

  • Get a professional review. Have a kitchen designer or your equipment supplier sanity-check the plan against your menu and local codes.
  • Confirm with your inspectors. Book your health and fire authorities to approve the floor plan before anything is built or bought.
  • Spec the equipment to fit. talk to our team to match ranges, refrigeration, and prep gear to your zones and volume.

Download the free quick guide

Save this as a PDF and keep it handy.

Kitchen Layout Planner – Free PDF

Frequently asked questions

What are the main commercial kitchen zones?+

Almost every commercial kitchen is built from five zones: receiving and storage, prep, the cooking line, plating and service, and warewashing. Receiving and storage handles deliveries and holds dry and cold goods. Prep is where food is washed, cut, and portioned. The cooking line does the hot cooking under an exhaust hood. Plating and service is the pass where dishes are assembled and sent out. Warewashing cleans and sanitizes. Laying the zones out in that order keeps food moving in one direction.

How much space should each station get?+

There is no single rule, because it depends on your menu and volume, but the honest answer is to size each station to the work it does at your busiest hour, not your daily average. Give the cooking line and prep the most bench and clearance, since that is where the labour concentrates. Leave at least a metre of clear aisle behind the line so staff can pass a working cook safely. Measure your actual room and lay out equipment footprints on paper before you buy anything.

Where should the ventilation hood go?+

The hood goes directly over your cooking line, covering every piece of equipment that produces grease-laden vapour: ranges, fryers, griddles, and char-broilers. Plan the hood and the cooking line as one block from the start, because moving a commercial hood later is expensive and disruptive. Cluster all your heat-producing equipment together so a single hood can cover it, and make sure fresh make-up air is supplied to balance what the hood exhausts. Confirm the fire-suppression requirements with your local authority.

How do I design for good workflow?+

Good workflow means food moves in one direction and never doubles back. Trace your busiest dish from the walk-in through prep, cooking, and plating to the pass, and make sure each hand-off is a step forward. Keep the cooking line tight so a cook can reach the fridge, the range, and the plate-up shelf without walking. Separate clean from dirty by routing used dishes back to warewashing along a path that avoids prep and plating. Fewer steps per plate means faster, calmer service.

Should I buy new or used equipment for a new kitchen?+

A mix is usually smartest. Buy your cooking line and refrigeration new or lightly used from a trusted supplier, since that is where reliability and food safety matter most and warranties count. Simple stainless steel items like work tables, shelving, and sinks barely wear out, so buying those used can free up budget without much risk. If cash flow is tight, financing the core equipment lets you open fully equipped rather than undersized. Match the spend to how hard each piece works.

A kitchen that flows starts with the right equipment sized to the right zones. Canada Food Equipment supplies commercial kitchens across the country, with a full online store, financing, and showrooms in cities like Vancouver and Hamilton. Browse the equipment catalogue or tell us your menu and we will help you build a layout that works from day one.
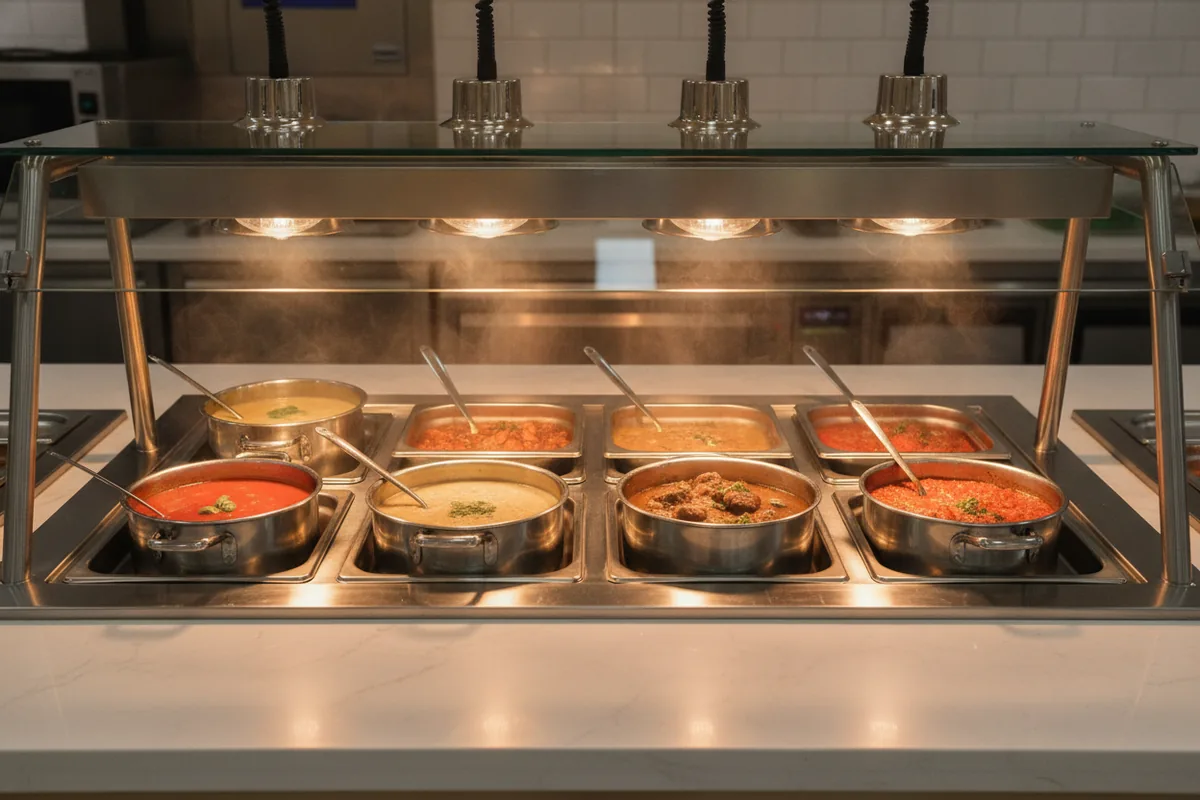
commercial food warmer

A 2026 Guide to Choosing the Right Commercial Food Warmer


It is the middle of a Saturday lunch rush, the line is six deep, and the roast chicken you plated twenty minutes ago is now lukewarm. That single weak link, holding cooked food at the wrong temperature, sends plates back, drags out tickets, and quietly puts your guests at risk. The fix is the right commercial food warmer for the way your kitchen actually runs, and choosing one is less about price and more about matching the unit to your menu and your volume.

This guide walks through the real choices in front of you in 2026: the main warmer types, how to pick by what you serve, the specs that separate a unit that holds steady from one that fights you all shift, and the buying mistakes that cost operators money. By the end you should be able to read a product page and know exactly which warmer belongs in your kitchen.

Start here: what a warmer is actually for

A food warmer has one job: keep food that is already cooked and already hot at a safe serving temperature until it reaches the plate. In Canada that safe line is 60 degrees Celsius, or 140 degrees Fahrenheit. Below it, you are in the temperature danger zone where bacteria multiply fast, which is why provincial guidance like Quebec public health and Alberta Health Services both draw the same line for hot holding.

Here is the part that trips up new operators. A warmer holds heat, it does not make it. It does not have the power to bring cold food up through the danger zone, so it should never be used to cook or to slowly reheat. Cook or reheat the food properly first, get it piping hot, then move it into the warmer to hold. Get that order right and a warmer becomes one of the most reliable tools on your line.

People often ask: is a warmer the same as a holding cabinet?

They overlap. A holding cabinet is a fully enclosed warmer, usually on wheels, built to hold large quantities of plated or panned food for catering and banquet service. A steam table, heat lamp, or countertop display is a warmer too, just open or partly open for grab-and-go service. Same goal, different format. Pick the format that fits how the food gets to the guest.

Stainless steel commercial steam table holding hot food in gastronorm pans on a serving line

The main types of commercial food warmer

Walk the warmer aisle and the choices sort into a handful of families. Each one is built around a different kind of food and a different style of service, so the names tell you most of what you need to know.

Steam tables and bain-marie units

These hold moist foods over a heated water bath, which keeps soups, sauces, gravies, and saucy mains hot without drying them out. They are the backbone of buffets, cafeteria lines, and catering setups. If your menu leans wet, a commercial steam table or a stand-alone soup kettle is usually your first buy.

Heated display and merchandising warmers

When you want guests to see the food and grab it, a heated display warmer keeps roast chickens, pastries, and hot grab-and-go items at temperature behind glass. Pizza-by-the-slice counters lean on countertop pizza warmers that show the product and hold it crisp.

Heat lamps and infrared strip warmers

For the pass, where plated food waits seconds or a couple of minutes before a server grabs it, radiant heat is the answer. Infrared strip warmers mounted over the line keep fries, fried chicken, and plated entrees hot and crisp without the sogginess that steam would cause.

Specialty and countertop warmers

Then there is the targeted gear: rice cookers and warmers that hold rice fluffy for hours, and catering supplies like chafers and induction setups for off-site events. Small footprints, focused jobs, standard outlets.

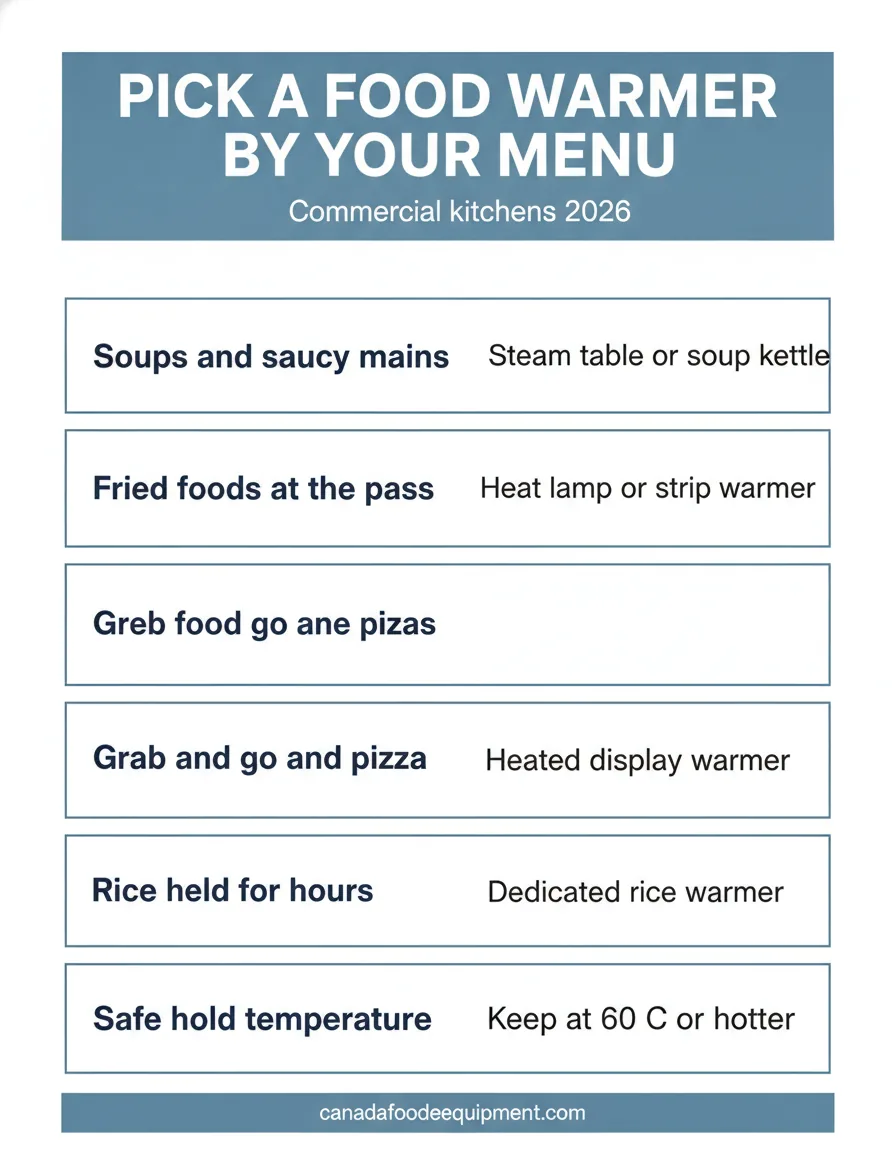
Which commercial food warmer to choose by menu type: steam table, heat lamp, heated display, rice warmer

Matching the warmer to your menu

Forget the spec sheet for a second. The first question is what you serve, because wet food and dry food want opposite things from a warmer. Steam keeps a stew perfect and turns fried chicken to mush. Radiant heat keeps that chicken crisp and dries a sauce into a skin. Sort your menu into wet and dry, and the warmer family almost picks itself.

  • Soups, sauces, saucy mains, vegetables in liquid. Steam table or soup kettle.
  • Fried foods, breads, plated entrees at the pass. Heat lamp or infrared strip warmer.
  • Grab-and-go, rotisserie, pastries, pizza slices. Heated display or pizza warmer.
  • Rice, grains, dumplings held for hours. Dedicated rice warmer.
  • Off-site catering and banquets. Chafers, induction, and holding cabinets.

The second question is volume. A cafe holding two trays at lunch and a banquet hall plating three hundred covers need very different units, even for the same dish. Size to your busiest service, not your average one. A warmer that just keeps up on a normal Tuesday will fall behind the moment you get slammed.

Did you know?

Open the lid on a steam table during a rush and the water bath loses heat fast, then has to claw it back. That recovery time is where cheap, underpowered units fail. The food creeps down toward the danger zone every time the line gets busy, which is exactly when you need it holding steady. Recovery speed, not just top temperature, is what separates a pro unit from a frustrating one.

Glass-front heated display warmer holding roast chicken and hot grab and go food

Specs that actually matter

Product pages throw a lot of numbers at you. Most are noise. A short list does the real work of telling you whether a warmer will hold up in your kitchen.

  • Holding temperature range. It has to comfortably reach and hold 60 degrees Celsius with the lid coming on and off, not just on paper.
  • Wattage and recovery. Higher wattage means faster recovery after the pan is opened. For busy lines this is the spec that matters most.
  • Wet versus dry capability. Confirm whether the unit runs as a wet steam well, a dry well, or both, and match it to your food.
  • Pan configuration. Count the full-size and fractional pans it takes, and check it fits your standard inserts.
  • Footprint and power. Countertop units run on a standard outlet; large floor units may need a dedicated circuit. Measure your line first.
  • Controls and build. Stainless construction, sealed controls, and a probe-friendly design make daily cleaning and temperature checks easier.

Holding food correctly is one leg of the basics that food safety educators call the core practices, alongside cleaning, separating, and cooking properly. The Partnership for Food Safety Education frames the whole thing simply: keep hot food hot and cold food cold. The right warmer is how you keep your end of that promise during a rush.

Pro tip from the sales floor

Buy one size up from what your menu needs today, not two. A slightly larger warmer holds temperature more easily and gives you room to add a dish or a station without buying again. Going too big, though, wastes energy and counter space holding empty pans hot all day. The sweet spot is comfortable headroom over your busiest current service.

Mistakes that cost you money and health scores

Most warmer regret comes down to a few avoidable errors. Knowing them before you buy saves you a return, a failed inspection, or a unit that quietly underperforms for years.

  • Using the warmer to reheat. It cannot bring food safely through the danger zone. Reheat first, then hold.
  • Trusting the dial. The dial shows the setting, not the food. Check the food itself with a probe thermometer.
  • Buying wet when you needed dry. A steam table will ruin your fried items. Match the heat type to the food.
  • Undersizing for the rush. A warmer that keeps up at noon Tuesday can fail at Saturday peak. Size to peak.
  • Skipping cleaning access. Sealed, stainless, easy-drain units stay sanitary; awkward ones invite buildup and inspector flags.

None of this is complicated once you have seen it on a real line. If you are unsure which unit fits your space and menu, our team is happy to talk it through before you spend a dollar. Browse the full food warmer range or the wider equipment shop to see what is in stock.

Please note: This article is general buying and food-handling information only. Hot-holding temperatures, time limits, and food safety rules vary by province and municipality. Always confirm current requirements with your local public health authority and follow the manufacturer instructions for your equipment. Canada Food Equipment is not liable for outcomes from actions taken based on this content.

Download the free quick guide

Save this as a PDF to keep on hand.

Commercial Food Warmer Buying Checklist (PDF)

Frequently asked questions

What temperature should a commercial food warmer hold?

A commercial food warmer should hold ready-to-serve food at 60 degrees Celsius (140 degrees Fahrenheit) or hotter the entire time it is on display or in the line. That number is not a preference, it is the line that keeps cooked food out of the range where bacteria multiply quickly. A good warmer holds that temperature steadily across the whole pan, not just near the element, which is why wattage and even heat distribution matter more than a high top-end number. Check the food with a probe thermometer, not the dial, since the dial only tells you what the unit is trying to do.

What is the difference between a food warmer and a steam table?

A steam table is one kind of food warmer. It uses a heated water bath under the pans to keep moist foods like soups, sauces, and stews hot and from drying out, which makes it the workhorse for buffets and cafeteria lines. Dry warmers, heat lamps, and heated display cases use radiant or convected heat instead of water, so they suit fried foods, breads, and plated items that would go soggy over steam. The right pick depends on whether your menu is mostly wet or dry, and many kitchens run both.

Can a food warmer cook or reheat food?

No, and treating it like an oven is one of the most common and dangerous mistakes on a line. A warmer is built to hold food that is already cooked and already hot. It does not have the power to bring cold or room-temperature food up through the danger zone fast enough, so food can sit for hours at a temperature where bacteria thrive. Always reheat in an oven, range, or steamer until the food is piping hot, then move it into the warmer to hold. The warmer keeps heat in, it does not create it.

How many watts does a commercial food warmer need?

It depends on the type and the volume, but more wattage generally means faster recovery after the pan is opened and more reliable holding in a cold kitchen. A small countertop soup kettle might draw under 500 watts, while a full multi-pan steam table or a tall heated display case can pull several thousand. The number that matters is whether the unit can hold 60 degrees Celsius under your real conditions, with the lid coming off every few minutes during a rush. Undersized units struggle, so size to your busiest service, not your slowest.

Are countertop food warmers worth it for a small kitchen?

For most small kitchens, cafes, and concession setups, a countertop warmer is the smarter buy. It plugs into a standard outlet, takes up little space, and handles the holding job for a focused menu without the cost or footprint of a full floor unit. Countertop pizza warmers, soup kettles, rice warmers, and small heated displays cover a lot of ground. The trade-off is capacity, so if you are plating high volume for a buffet or banquet, a larger steam table or floor warmer will serve you better.

Sources and references

Your next step: sort your menu into wet and dry, size to your busiest service, and shortlist by warmer type before you compare prices. If you want a second opinion on which unit fits your kitchen, get in touch with Canada Food Equipment and we will help you match the right warmer to your menu, your space, and your volume.

Commercial slush machine and ice cream machine on a cafe counter

Slush Machine vs. Ice Cream Machine: Which Is Better for Your Business?

When the weather turns and lineups build, a frozen treat is one of the easiest ways to lift a check average, and the question we hear most is whether to buy a slush machine or an ice cream machine. They both sell cold and both draw a crowd, but they run very differently behind the counter. Our range of commercial ice cream and slush machines covers both, so this guide walks you through which one earns its space in your business.

Here is the quick take. A slush machine is the lower-cost, lower-labour play that thrives on impulse volume. An ice cream machine costs more and asks for more daily care, but it delivers a higher-ticket, signature dessert. Your traffic, your staff, and your concept decide the winner, and the sections below make that call clear.

What each machine actually makes

Start with the product, because that is what your customers actually buy. A slush machine chills a flavoured liquid mix and keeps it churning in a clear hopper so it stays as a loose, drinkable slush. It is built for frozen drinks, slushies, and granita, and the see-through bowl doubles as advertising: a swirl of bright colour pulls in impulse buys all on its own.

An ice cream machine, most often a soft serve unit, freezes and whips a richer dairy or plant mix into a smooth, pipeable dessert that you pull straight into a cone or cup. It can also handle gelato and frozen yogurt depending on the model. That means a heavier, more precise machine and a thicker product, but also a dessert people are happy to pay more for. The two units share a counter well, but they are chasing different sales.

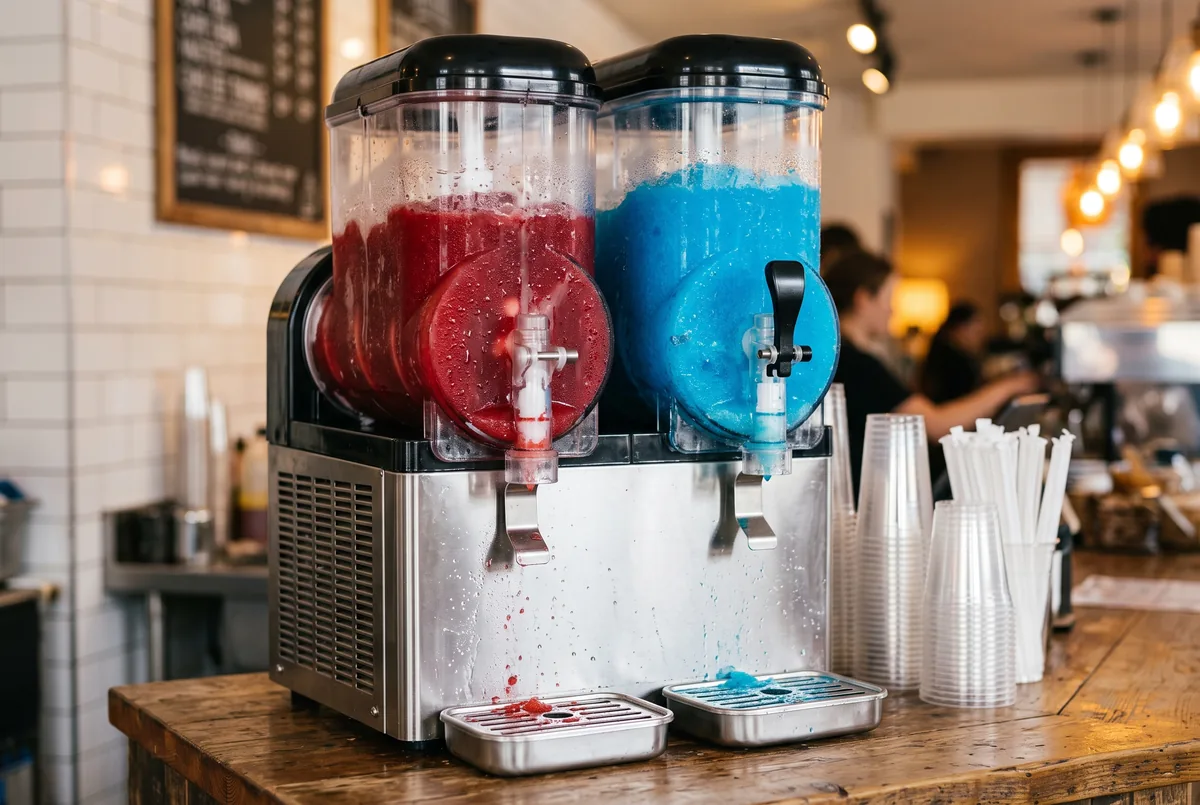
Commercial slush machine with two hoppers of bright frozen drinks
A slush machine sells on colour, low labour, and impulse volume.

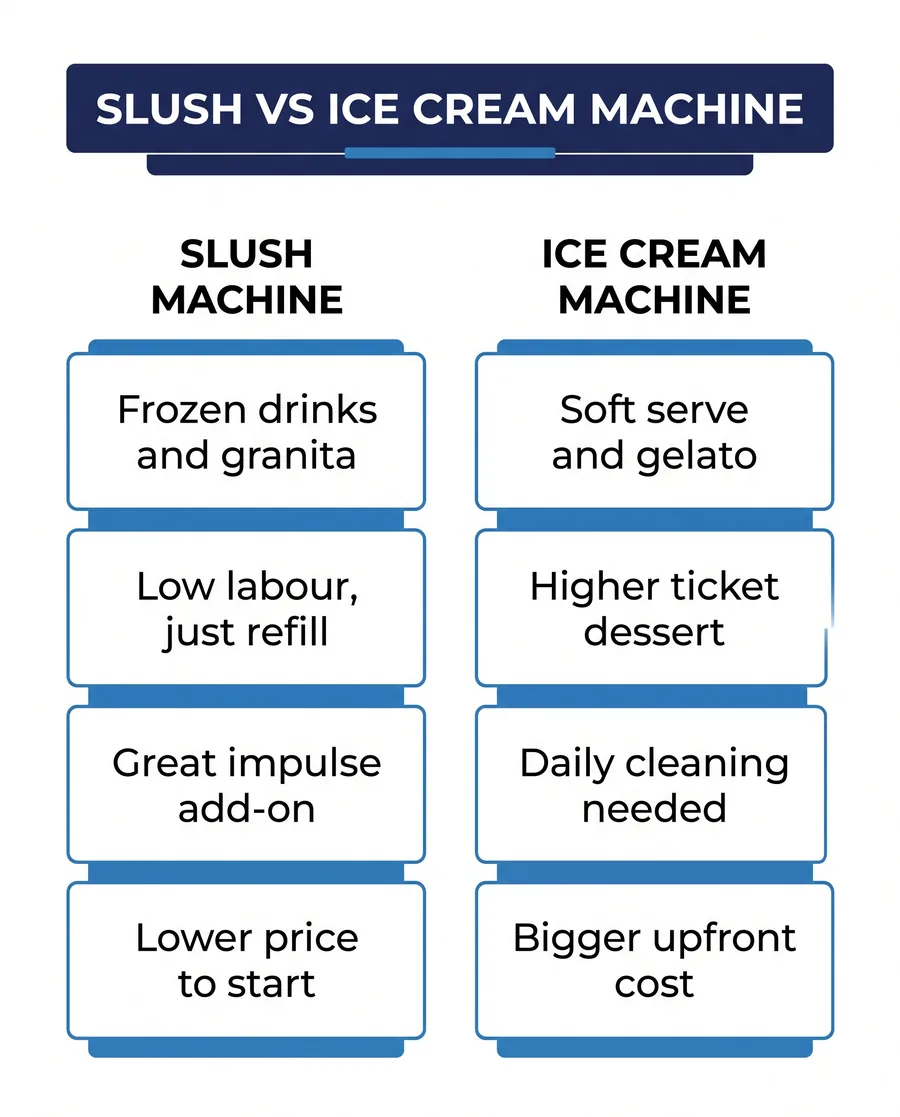
Before we go deeper, the table below lines up the trade-offs side by side so you can see where each machine pulls ahead.

What you are weighingSlush machineIce cream machine
What it servesFrozen drinks, slush, granitaSoft serve, gelato, frozen yogurt
Upfront costLower to get startedHigher, more complex machine
Daily labourLight, mostly refilling mixHeavier, daily cleaning and sanitizing
Ticket and marginLow ticket, strong impulse volumeHigher ticket, signature dessert
Best fitCafes, c-stores, snack bars, patiosDessert shops, QSRs, high-traffic sweet menus

Save your money

If cash flow is tight, a slush machine is the gentler first step. The lower upfront cost and simple daily routine let you test frozen sales on your counter without a big commitment. If it flies off the shelf, that proven demand makes it far easier to justify adding an ice cream machine next season.

When a slush machine is the better buy

A slush machine shines when you want a fun, fast, low-maintenance item that sells itself. Convenience stores, snack bars, cafes, cinemas, and patio spots all do well with one, because the product is cheap to make, quick to serve, and needs almost no training. Staff top up the mix, the machine does the rest, and the bright hopper markets the drink to everyone who walks past.

It is also the easier machine to own. Daily labour is light, the upfront price is friendly, and you can add flavours or seasonal colours without changing anything about the equipment. If your goal is more impulse revenue per customer rather than a destination dessert, the slush machine is usually the smarter spend. It quietly adds dollars to tickets you were already ringing up.

When an ice cream machine wins

An ice cream machine earns its higher price when dessert is part of your identity, not just an add-on. Soft serve and gelato carry a bigger ticket and a bigger wow factor, and for a dessert shop, a quick-service restaurant, or a high-traffic sweet menu, that signature swirl can be the reason people choose you over the spot next door. The margin on a well-run soft serve program is hard to beat.

The trade-off is care. These machines cost more, they need more counter space and power, and frozen dairy demands a disciplined daily cleaning and sanitizing routine to stay safe. If you have the volume to justify it and the staff to maintain it, an ice cream machine turns dessert into a real profit centre rather than a nice extra.

Soft serve ice cream pulled from a commercial machine into a cone
An ice cream machine trades more daily care for a higher-ticket signature dessert.

Did you know?

Some of our units are ice cream and gelato showcases paired with slush capability, so you can merchandise scooped product and pour frozen drinks from one display. For a shop that wants a full frozen dessert corner, those combination showcases can cover more of the menu in a single footprint. Read the model details to see exactly what each one serves.

Polar U-Series Compact Soft Serve Ice Cream Machine – Setup Guide

Match the machine to your space and volume

Once you know which product fits your concept, size it to your traffic and your counter. A single-hopper slush unit suits a small cafe, while a busy c-store may need two or three bowls so it never runs dry on a hot afternoon. For soft serve, match the machine output to your rush and confirm you have the power and clearance. Run your situation through the quick selector below.

Which frozen unit fits my business?

A quick pointer, not a final spec. Volume, power, and space still matter, so ask for a quote.

Comparison chart of a slush machine versus an ice cream machine
Slush versus ice cream machine, side by side.

Pro tip

Whatever you choose, size up for your peak, not your average. A frozen unit that empties mid-rush costs you the exact sales you bought it for. Tell us your busiest hour and your counter dimensions and we will point you to a unit that keeps up without crowding your line.

Please note: This article is general buying guidance for foodservice operators, not a food safety ruling or a guarantee of results. Frozen dessert equipment varies in capacity, power draw, and cleaning requirements. Confirm the specs, your electrical supply, and local health rules for frozen dessert handling before you order.

Download the free decision guide

Keep the slush vs ice cream machine guide handy while you compare models and quotes.

Slush vs Ice Cream Guide – Free PDF

Canada Food Equipment supplies new frozen dessert equipment to cafes, convenience stores, dessert shops, and restaurants across Canada. Compare models in our ice cream and slush machines range, explore the gelato showcases and slush machines, or pair either with a commercial ice machine. When you are ready, contact our team for a quote and we will size the right unit for your space and volume.

Frequently asked questions

Is a slush machine or an ice cream machine cheaper to run?

A slush machine is usually the lighter lift on both cost and labour. The unit itself tends to cost less upfront, the mix is simple to prepare, and daily upkeep is mostly topping up the hopper rather than a full teardown. An ice cream machine, especially a soft serve unit, costs more to buy and demands a real daily cleaning and sanitizing routine to stay safe and legal. Running costs also depend on how hard the compressor works, so pick an energy-conscious model. You can review the ENERGY STAR Canada program when you compare efficiency.

Can one machine make both slush and ice cream?

Not really, and you should be cautious of anything that claims to do both well. A slush machine freezes a liquid mix just enough to keep it in a drinkable, slushy state, while an ice cream machine freezes and churns a richer mix to a scoopable or pipeable texture. The refrigeration, the augers, and the mix are tuned for those different end results. If you want both on your menu, most operators run two dedicated units. That keeps each product at its best and avoids a compromise machine that does neither job cleanly.

How much daily cleaning does each one need?

Slush machines are the easier of the two. Many can run a couple of days between full cleans if the mix and manufacturer allow, though you should still wipe down and follow the maker’s schedule. Soft serve ice cream machines are stricter: dairy mix sitting in the barrel needs regular breakdown, cleaning, and sanitizing, often daily, to prevent bacterial growth. Before you buy, be honest about the staff time you can commit. Handling frozen dairy safely is a real responsibility, so check the food safety standards from the Canadian Food Inspection Agency for your setup.

Which one makes more money for a small cafe or store?

It depends on your traffic and your concept. A slush machine wins on volume and impulse: it is a low-cost, fun add-on that sells fast on a hot day and needs little training, which suits a convenience store, snack bar, or patio. An ice cream machine wins on ticket size and identity: soft serve and gelato carry a higher price and can become the reason people visit, which suits a dessert-focused shop or a busy quick-service spot. If you are unsure, many operators start with a slush unit and add an ice cream machine once demand proves out.

Stainless commercial pizza prep table in a restaurant kitchen

Pizza Prep Table vs. Sandwich Prep Table: What’s the Difference?

If you are speccing a new line, a pizza prep table and a sandwich prep table can look almost identical in a catalogue: both are a refrigerated base with a rail of pans on top. The difference is real, though, and buying the wrong one slows your line every shift. Our refrigerated pizza prep tables and sandwich and cold prep tables are built around two different jobs, and this guide shows you which job matches your menu.

Short answer first. Choose a pizza prep table when your menu is built on dough and you need a wide board plus deeper topping pans. Choose a sandwich prep table when you build subs, wraps, and salads and want more shallow pans in reach for fast assembly. The rest of this guide breaks down why.

What a pizza prep table is built to do

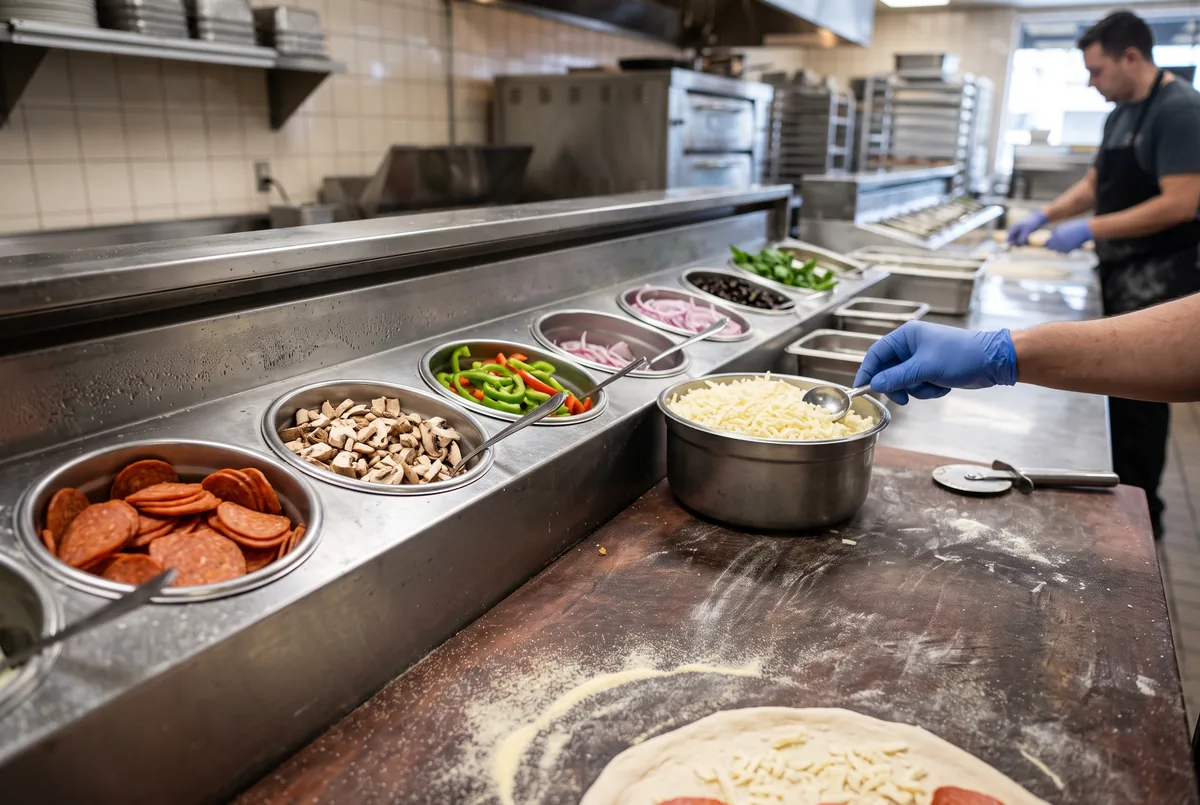
A pizza prep table is designed around one thing: stretching and dressing dough. The giveaway is the wide cutting board across the front, usually deeper than what you see on other prep units, because you need real estate to work a crust. Behind that board sits a raised rail of refrigerated pans, and those pans tend to be deeper so they can hold a full service of sauce, shredded cheese, and chunky toppings without constant refills.

The base matters just as much. Pizza prep tables are commonly sized to store dough boxes and bulk cheese in the refrigerated cabinet below, so your whole pizza station lives in one footprint. If you run a dedicated pizza program, that combination of a big board, deep pans, and dough-friendly storage is exactly why the unit exists. Pair it with the right oven from our commercial pizza ovens and the station almost builds itself.

Pizza prep table with round topping pans on a raised refrigerated rail
The wide board and deep topping rail are what set a pizza prep table apart.

People often ask: do I need a special pizza table, or will any prep table work?

If pizza is a core part of your menu, the answer is usually yes. The wide board and the deeper pan wells are hard to fake on a standard sandwich unit, and a cramped board slows every pie. If pizza is a small side item, a general prep table with the right pans can get you by until volume grows.

What a sandwich prep table does differently

A sandwich prep table, sometimes called a cold table or a sandwich and salad unit, is tuned for speed and variety rather than dough. Instead of one big board, it gives you a narrow assembly strip along the front and a flat rail that holds more pans across the top. Those pans are usually shallow and rectangular, which is perfect when you need lettuce, tomato, three deli meats, two cheeses, and a few spreads all within one arm’s reach.

Because the rail carries the workload, sandwich tables often run shorter and shallower than pizza units, which helps them slot into a tight deli or cafe line. The refrigerated base below still holds backup pans and trays, so your line cook can restock without leaving the station. If your day is built on subs, wraps, burgers, and salads, this layout keeps assembly fast and keeps every cold ingredient at the point of use.

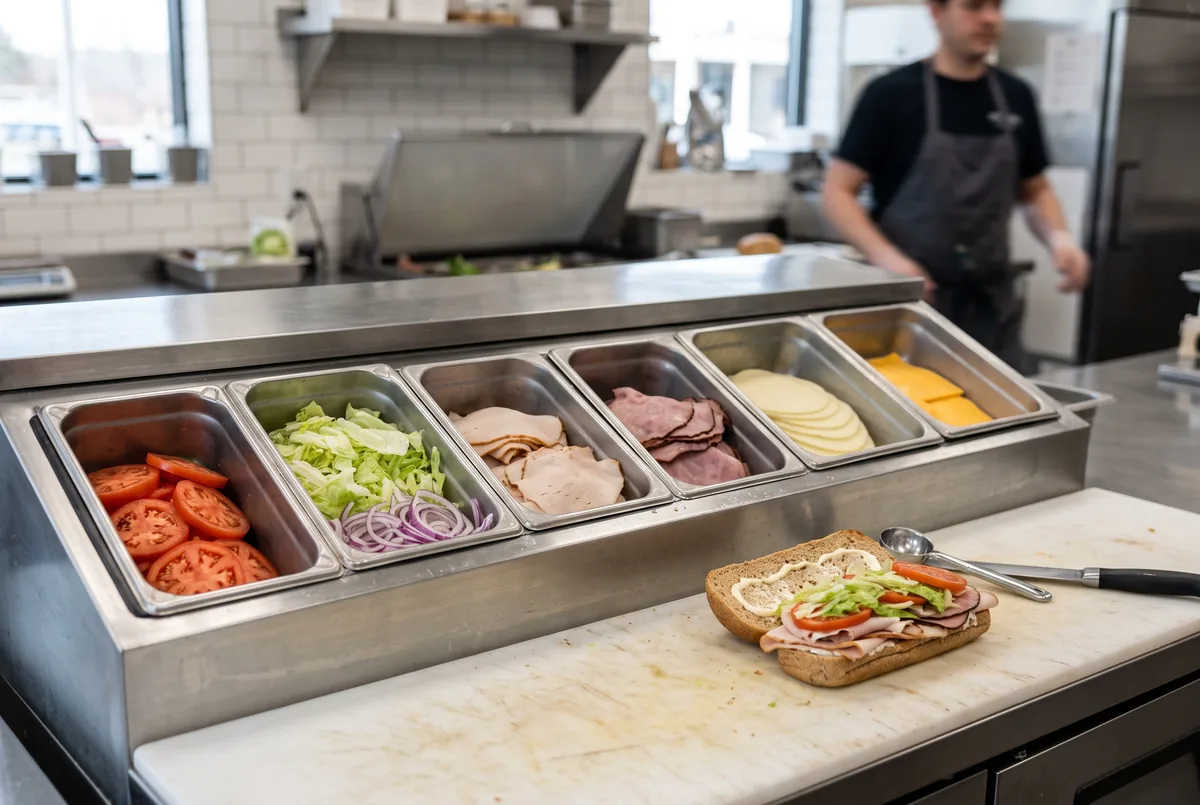
Sandwich prep table with rectangular pans of deli ingredients on a flat rail
A sandwich prep table packs more shallow pans across a flat rail for fast assembly.

Did you know?

Some units are sold as mega-top or dual-purpose tables that widen the pan rail so you can carry a big ingredient count. They blur the line between the two styles, which is handy for a mixed menu, but they still favour either dough work or deli assembly depending on the board width and pan depth. Read the pan chart, not just the name.

Pizza prep table vs sandwich prep table at a glance

Here is the quick comparison most buyers want. Treat it as a starting point, then confirm the exact pan layout and dimensions on the model you like, since manufacturers vary.

What you are comparingPizza prep tableSandwich prep table
Work surfaceWide, deep cutting board for stretching doughNarrow front board for quick assembly
Topping pansDeeper round or square inserts on a raised railMore shallow rectangular pans across a flat rail
Base storageSized for dough boxes and bulk cheeseSized for deli trays and backup pans
Best menu fitPizza, calzones, flatbreadsSubs, wraps, burgers, salads
FootprintOften deeper front to back for the boardOften shorter, fits a tight line
Beverage-Air Pizza Prep Table Overview

Pro tip

Before you fall for a spec sheet, walk your line with a tape measure and count your busiest pan set. Nine times out of ten the right table is decided by two things: how many pans you need in reach and how much room the board needs. Everything else is a detail.

Which one fits your menu

Run your menu through the quick selector below. It points you toward the style that usually fits, then you can narrow down the size and pan setup from there or ask us to spec it with you.

Which prep table fits my menu?

A quick pointer, not a final spec. Pan sizes and line layout still matter, so ask for a quote.

Comparison chart of pizza prep table versus sandwich prep table
Pizza versus sandwich prep table, side by side.

Please note: This guide is general buying information for foodservice operators, not a food safety or engineering ruling. Pan sizes, capacities, and refrigeration performance vary by model. Confirm the specs, the pan configuration, and local health rules for cold holding before you commit to an order.

Download the free spec checklist

Take the pizza vs sandwich prep table checklist with you when you compare models.

Prep Table Spec Checklist – Free PDF

Canada Food Equipment ships new commercial refrigeration to restaurants, delis, pizzerias, and cafes right across Canada. If you are still weighing a pizza prep table against a sandwich prep table, browse the full range in our commercial refrigeration category or contact our team for a quote and we will match a unit to your menu, your line, and your budget.

Frequently asked questions

What is the main difference between a pizza prep table and a sandwich prep table?

The difference comes down to the work surface and the pans. A pizza prep table gives you a wide, deep cutting board across the front so you have room to stretch dough and dress a pie, and it uses a raised rail of deeper topping pans behind it. A sandwich prep table trades that big board for a narrow assembly strip and packs more shallow rectangular pans across a flat rail. Both keep ingredients cold at the point of use, but the pizza unit is shaped around dough work while the sandwich unit is shaped around fast, high-count assembly.

Can I make sandwiches on a pizza prep table, or pizza on a sandwich table?

You can, within reason. A pizza prep table will handle sandwich building if you swap in shallower pans, and many kitchens run a mixed menu off one. Going the other way is harder: a sandwich prep table usually lacks the wide board and the deeper pan wells that pizza work wants, so dough stretching feels cramped. If your menu leans one way, buy for that side. If you are truly split, a pizza table with a large mega-top rail tends to adapt better than forcing a sandwich unit to do pizza.

What food temperature should a prep table hold?

A commercial prep table is a cold-holding unit, so the goal is to keep ingredients out of the temperature danger zone. In Canada that means keeping cold food at or below 4C. Well-designed units hold the base and the pan rail cold, but a busy line, a warm kitchen, or overfilled pans can let the top pans drift warmer than the base. Keep pan lids on when you can, do not overfill, and check pan temperatures during service. You can review the general food safety standards from the Canadian Food Inspection Agency for your operation.

How do I know what size prep table to order?

Start with two numbers: how many pans you need in reach during a rush, and how much line space you actually have. Count your busiest topping or filling set, add a little room to grow, and that tells you the rail length. Then measure the gap on your line, front to back and side to side, including door swing and walk space. Pizza tables often run deeper because of the board, so a unit that fits a deli line may crowd a pizza station. When the two numbers pull against each other, share them with our team and we will point you to models that fit both.

A Buyer's Guide to Used Restaurant Equipment in Canada

A Buyer’s Guide to Used Restaurant Equipment in Canada


Opening a restaurant or expanding an existing kitchen is expensive. Commercial-grade equipment eats up a massive portion of startup budgets – a single convection oven can run $4,000 to $10,000 new, and that’s before you factor in ranges, refrigeration, prep tables, and dishwashers. Buying used commercial kitchen equipment is one of the most effective ways to cut those costs dramatically, sometimes by 40-70% compared to new. But the used market carries real risks: hidden mechanical problems, missing certifications, and equipment that’s been run hard and is nearing the end of its service life. This guide walks you through exactly what to check when buying used restaurant equipment, where to find quality pieces, and how to avoid the costly mistakes that catch first-time buyers off guard.

Why Buy Used? The Financial Case for Pre-Owned Commercial Equipment

The numbers make a compelling argument. A used commercial range that retailed for $8,000 new might sell for $2,500-$3,500 after just two or three years of service – and if it was maintained properly, it has years of productive life remaining. For a startup restaurant working with limited capital, those savings can cover months of rent or payroll. The depreciation curve on commercial kitchen equipment is steep, similar to vehicles, which means smart buyers can access near-new quality at a fraction of the cost.

Beyond the price advantage, used equipment is often better built than today’s entry-level new equipment. Equipment manufactured in the 1990s and 2000s by established brands like Hobart, Vulcan, Manitowoc, and Garland was built to last decades. Some of that older equipment, properly maintained, outlasts cheaper new alternatives built with more plastic components and thinner steel. This is especially true for heavy mechanical equipment like mixers, slicers, and commercial dishwashers.

Cash flow matters enormously in the restaurant industry, where margins are notoriously thin. The money saved on equipment can be redirected toward food costs, staffing, and marketing – the inputs that actually drive revenue. Many successful restaurant operators make a deliberate policy of buying used for most kitchen equipment and reserving new purchases for items where reliability is critical or where financing makes new equipment financially sensible.

There’s also an environmental argument. Commercial kitchen equipment contains significant amounts of steel, copper, and other materials. Extending its useful life keeps it out of the waste stream and reduces the energy and resources needed to manufacture replacement units. In an industry increasingly conscious of its environmental footprint, buying quality used equipment is a straightforward sustainability choice.

What to Inspect Before You Buy: A Systematic Approach

A systematic inspection process separates informed buyers from those who end up with expensive problems. Don’t let a low price or a seller’s enthusiasm rush you – take your time and check every component methodically.

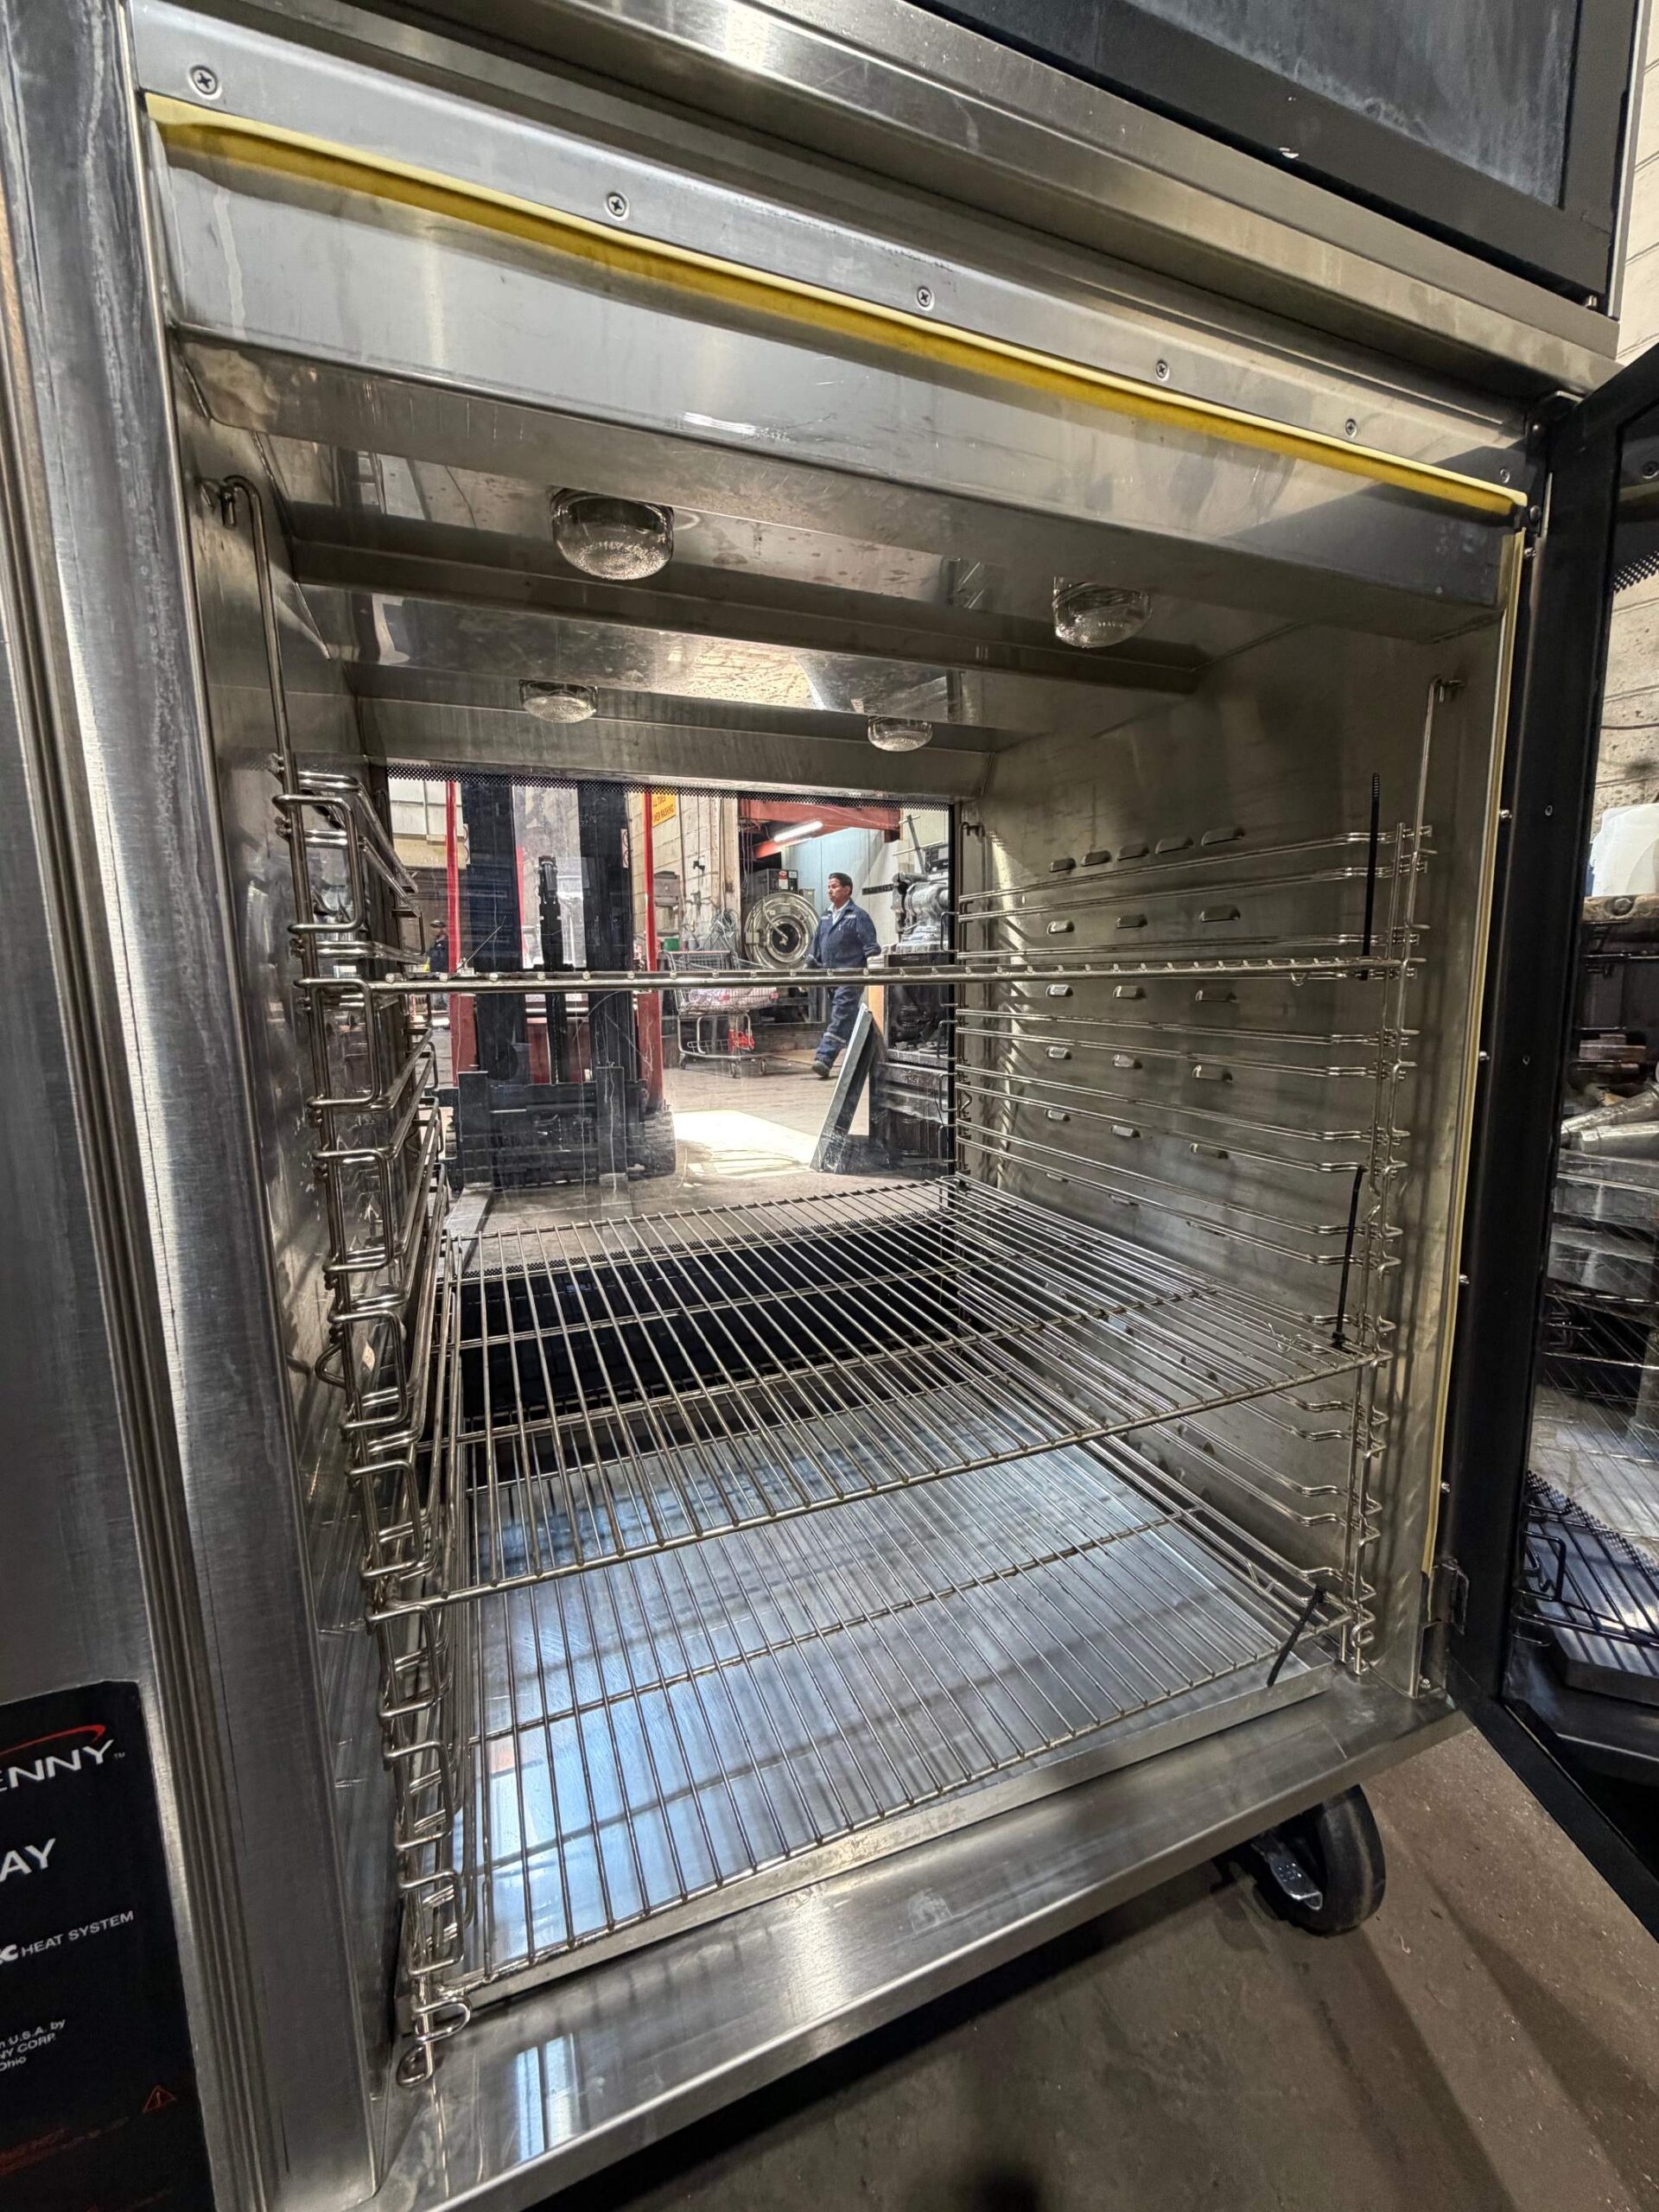
Power it on first. This is the single most important test. Any seller who won’t let you operate the equipment under power before purchase is a red flag. Run ovens at temperature for at least 15 minutes. Cycle refrigeration equipment and verify it reaches and holds its target temperature. Turn on every burner on a range. Run a mixer through its speed settings under load. Listen for unusual noises – grinding, knocking, or high-pitched squealing all indicate mechanical problems that will only get worse.

Inspect welds, seams, and structural integrity. Commercial kitchen equipment takes brutal abuse – heat cycling, vibration, heavy loads, and constant cleaning with harsh chemicals. Check all welds for cracks or separation. Look at the feet and mounting points. Examine any hinges, latches, and door mechanisms. Structural damage is expensive to repair and often indicates equipment that was used hard without proper maintenance.

Check all seals and gaskets. On refrigeration equipment, door gaskets are wear items that harden and crack over time, causing the unit to work harder and run up electricity bills. Replacement gaskets typically cost $50-$200 per door, but if multiple doors need replacement, it adds up. Press the gasket gently with your finger – it should be pliable, not stiff or cracked.

Look for corrosion and rust. Surface rust on exterior panels is usually cosmetic. But rust inside a refrigeration unit, on burner grates that have never been cleaned, or on the interior of an oven indicates either a sanitation problem or a unit that was stored improperly. Some surface cleaning is normal; deep corrosion on structural components is a dealbreaker.

Verify the data plate. Every piece of commercial equipment has a data plate specifying voltage, amperage, BTU output, and certification marks. Make sure the specifications match your kitchen’s electrical and gas supply. A 3-phase 208V commercial oven is useless if your kitchen only has single-phase 240V service. Check that CSA or ULC approval marks are present for Canadian use.

High-Risk vs. Low-Risk Equipment Categories

Not all used equipment carries the same risk profile. Understanding which categories are safer bets and which require extra caution helps you allocate your inspection effort and negotiate appropriately.

Lower-risk categories include stainless steel work tables, shelving, sinks, prep equipment, and small wares. These items have minimal mechanical complexity, are easy to inspect visually, and are inexpensive to repair or replace components. A used stainless prep table in good structural condition is almost always a safe buy.

Medium-risk categories include commercial ovens, ranges, and fryers. Gas equipment requires inspection of burners, pilots, valves, and heat exchanger integrity. Convection oven fans and motors can fail, but replacement parts are generally available for major brands. The key risk is incomplete combustion or heat exchanger cracks in gas equipment – always have a gas fitter verify a used gas appliance before putting it into service.

Higher-risk categories require the most careful scrutiny. Commercial refrigeration (especially walk-in coolers and freezers), commercial dishwashers, and espresso machines have complex mechanical and electrical systems where repairs can be as expensive as replacement. Ice machines are notorious for expensive repairs and require meticulous sanitation inspection.

Hobart mixers are a special case – these machines are legendarily durable and used Hobarts are almost always worth buying if structurally sound, because the brand has been manufacturing replacement parts for decades. A 20-year-old Hobart HL200 mixer may have more useful life left than a new off-brand mixer bought today.

Watch: Benefits of Buying Used Restaurant Equipment

Where to Source Used Restaurant Equipment in Canada

The quality of what you find – and the reliability of your purchase – varies significantly depending on where you buy.

Restaurant equipment dealers are typically the safest source. They inspect, clean, and often recondition equipment before resale, and many offer limited warranties. Their prices are higher than buying from a liquidation, but the reduced risk often justifies the premium. Look for dealers who specialize in commercial foodservice equipment rather than general used goods.

Restaurant liquidations and auctions are where the best deals appear. When a restaurant closes, its equipment is often sold at a fraction of replacement value, sometimes in good condition. The risk is that you may be buying equipment from a business that failed partly because of deferred maintenance. Bring a technician if you’re bidding on high-value items.

Online marketplaces (Kijiji, Facebook Marketplace, used equipment listing sites) offer broad selection but require the most due diligence. Never buy refrigeration or gas equipment online without an in-person inspection. The photos rarely tell the full story, and shipping commercial equipment is expensive if you discover problems after the fact.

Equipment dealers like Canada Food Equipment offer a curated inventory of commercial foodservice equipment with the benefit of expert knowledge and the ability to find specific items. Whether you’re outfitting a new restaurant, replacing failed equipment, or expanding capacity, working with a specialist saves time and reduces risk compared to navigating the open used market alone.

Certifications and Compliance You Can’t Skip

Canadian food safety regulations and building codes require that commercial kitchen equipment meet specific certification standards. Cutting corners here isn’t just risky – it can result in failed health inspections, insurance claims being denied, or in the worst case, fires and injuries.

NSF International certification is required for food contact equipment in most Canadian jurisdictions. This covers prep tables, refrigeration units, slicers, mixers, and similar equipment. NSF certification means the equipment was designed and built to be cleanable and sanitary. Health inspectors look for this mark – equipment without it may need to be removed from service.

CSA (Canadian Standards Association) or ULC approval is required for electrical and gas equipment. This certification confirms the equipment meets Canadian electrical safety standards. Equipment with only UL (US) approval may be acceptable depending on your jurisdiction, but CSA is the Canadian standard and is universally recognized.

When buying used equipment, verify the data plate is still readable and the certification marks are intact. Equipment that has been heavily modified or has had the data plate removed may no longer comply with its original certification, creating liability and inspection issues.

Negotiating Price and Protecting Your Purchase

Armed with inspection knowledge, you’re in a much stronger position to negotiate. Every defect you identify is a negotiating point. A fryer with a worn thermostat, a refrigerator with a cracked gasket, or a mixer with a scratched bowl – price these repairs before negotiating and use them to reduce the asking price.

Research the market before you buy. Check what comparable equipment sells for from dealers and in online listings. Know the replacement cost of major components – compressors, burner assemblies, heating elements. This knowledge lets you calculate whether a piece of equipment is worth buying at all, and at what price it becomes a good deal.

If buying from a dealer, ask about their return policy and any warranty terms. Even a 30-day return window gives you time to have equipment installed and tested in your kitchen. For private sales, consider having a technician do a pre-purchase inspection – the $150-$300 inspection cost is cheap insurance on a $3,000 purchase.

Finally, factor in installation costs before finalizing your budget. Gas equipment needs a licensed gas fitter. Electrical equipment above 120V typically needs an electrician. Walk-in coolers require refrigeration contractors. These costs can add $500-$2,000 per piece and should be part of your total cost calculation when comparing used vs. new options.

Need Commercial Kitchen Equipment?

Canada Food Equipment offers new and used commercial restaurant equipment across Canada. Get in touch for expert advice and competitive pricing.

Browse Our Inventory

Frequently Asked Questions

What should I inspect first when buying used restaurant equipment?+

Start with the mechanical and electrical components – power it on, check for unusual noises, and verify all burners, heating elements, or compressors function correctly. Physical condition matters too, but a scratched exterior is far less costly than a failed compressor. Always ask for service records if available.

Is it worth buying used commercial refrigeration equipment?+

Used refrigeration can be a smart buy if the compressor, condenser coils, and door gaskets are in good shape. Have a refrigeration technician inspect the unit before purchase – a full compressor replacement can cost $800-$2,500 or more, which may negate your savings. Look for Energy Star-rated units even in the used market.

How old is too old for used commercial kitchen equipment?+

There’s no universal rule, but most commercial kitchen equipment has a useful life of 10-15 years with proper maintenance. For high-wear items like fryers and grills, 7-10 years is a more conservative benchmark. Always weigh repair costs, parts availability, and energy efficiency against the purchase price.

Where is the best place to buy used restaurant equipment in Canada?+

Restaurant supply dealers and equipment auctions are typically your best sources – they often refurbish units and may offer short warranties. Online platforms like Kijiji and eBay can yield deals but carry higher risk since you may not be able to inspect before buying. Restaurant liquidations are another excellent source of quality equipment at significant discounts.

Do I need professional installation for used commercial equipment?+

For gas-connected equipment (ranges, fryers, ovens), professional installation by a licensed gas fitter is mandatory under Canadian regulations – this isn’t optional. Electrical equipment above 120V also typically requires a licensed electrician. Improper installation voids insurance, creates safety hazards, and can result in health inspection failures.

Can I negotiate the price on used restaurant equipment?+

Absolutely – price negotiation is expected and normal in the used equipment market. Research comparable units online before negotiating, and use any defects, missing accessories, or age as leverage. Buying multiple pieces from the same seller often opens the door for package pricing.

What certifications should used restaurant equipment have?+

Look for NSF International certification on food contact equipment (slicers, prep tables, refrigeration) and CSA or ULC approval on gas and electrical equipment. These certifications are required by most health authorities in Canada. Equipment missing these marks may fail health inspections, costing you far more than you saved.

Should I buy a warranty when purchasing used restaurant equipment?+

If a dealer offers a 90-day parts and labour warranty, it’s usually worth taking – it gives you time to discover hidden problems. For private sales with no warranty, budget 10-15% of the purchase price for potential repairs in the first year. Some independent service companies also offer extended service contracts on refurbished equipment.

commercial grease trap maintenance

A Complete Guide to Commercial Grease Trap Maintenance for Restaurants


A backed-up kitchen on a Friday night is almost always a grease problem that someone put off. The fix is unglamorous and cheap compared to the alternative: a simple, written maintenance routine for your commercial grease trap. Keep it clean on a schedule and it does its job silently for years. Ignore it and it will eventually flood your floor, foul your drains, and hand you a bylaw fine.

This guide keeps it practical. We cover why the trap matters, how it works, how to set a cleaning schedule that actually sticks, the step-by-step for cleaning a small unit yourself, and the warning signs that mean it is time to act. No jargon, just the routine that keeps your kitchen running and your inspections boring.

Why a grease trap is not optional

Fats, oils, and grease are the enemy of every drain in a commercial kitchen. Pour them down a sink and they cool, harden, and cling to pipe walls until the line chokes. That is the problem cities are trying to prevent, which is why most municipalities require food businesses to install and maintain a trap. The City of Toronto, for example, mandates a working grease interceptor for any food service establishment and backs it with fines that can reach into the tens of thousands.

It is not just a local concern. Keeping grease out of the sewer is the whole point of programs like the US EPA National Pretreatment Program, and Canadian cities run their own versions. The takeaway for an operator is simple: the trap is the law, and keeping it clean is your responsibility, not the city’s.

Did you know?

Hardened restaurant grease is the main ingredient in the sewer blockages cities call fatbergs, some of them the size of a bus. A single neglected kitchen trap will not build one alone, but every trap that overflows feeds the problem, which is exactly why municipal bylaws come with real penalties attached.

Gloved hands cleaning a commercial under-sink grease trap with a scraper

How a grease trap actually works

The mechanism is refreshingly simple, which makes the maintenance simple too once you picture it. Wastewater from your sinks and dishwasher flows into the trap. Inside, the flow slows down, and physics does the sorting. Grease and oil are lighter than water, so they float and collect at the top. Food solids are heavier, so they sink to the bottom. The cleaner water in the middle passes out to the sewer.

Over a few weeks that top layer of grease and bottom layer of solids both grow. The trap keeps working until those layers get thick enough to reach the outlet, and then grease starts slipping through into your drain lines. That is the moment your maintenance window closes. The entire job of a cleaning routine is to scoop those two layers out before they ever get that far.

People often ask: do dishwasher detergents make it worse?

They can. Harsh degreasers and very hot water can emulsify grease, breaking it into tiny droplets that float less and slip through the trap into the sewer. Using the right cleaning products and not overloading the system helps the trap do its job. It is one more reason to pair good equipment with the right consumables.

Grease trap maintenance at a glance: clean before 25 percent full, measure, schedule, log, dispose
Building a cleaning schedule that holds

Here is the rule almost every program comes back to: clean the trap before the grease and solids reach 25 percent of its depth. The City of Toronto grease interceptor maintenance guidance and most municipal codes use that 25 percent line, sometimes with a fixed maximum interval on top of it.

How often that lands for you depends on your kitchen. A small under-sink trap in a busy fryer-heavy kitchen might hit 25 percent in a week or two. A larger interceptor on a moderate menu might run a month or more. The smart move is to measure, not guess.

  1. Measure for the first few cycles. Open the trap weekly and note how deep the grease and solids have built up.
  2. Find your 25 percent point. See how long it takes to reach a quarter of the trap depth.
  3. Set the schedule with a margin. Clean a little before that point so a busy week never pushes you over.
  4. Write it down and assign it. A named person, a fixed day, and a log. Routines that live in someone’s head get skipped.
  5. Keep your records. Note the date, who cleaned it, and where the waste went. Inspectors ask.

Pro tip from the maintenance side

Tape a simple log sheet to the wall right above the trap, not in an office binder. Date, initials, and a tick. When the record lives where the work happens, it actually gets filled in, and you have instant proof for an inspector. The cheapest compliance tool in the kitchen is a printed sheet and a pen.

Stainless steel commercial kitchen sink and dishwashing area drain line

How to clean an under-sink trap, step by step

For a small under-sink unit, an in-house clean is realistic with a trained, gloved team. Larger in-ground interceptors usually need a licensed hauler with a pump truck. For the small ones, the routine looks like this.

  1. Gear up. Gloves, apron, a scraper or scoop, a heavy-duty bag or bucket for the waste, and rags.
  2. Stop the flow. Make sure no one is running water into the trap. Remove the lid carefully, expect an odour.
  3. Note the levels. Quickly check the grease and solid depth for your log before you disturb them.
  4. Scoop the grease and solids. Remove the floating grease, then the settled solids, into your waste container.
  5. Scrape and wipe. Clean the lid, baffles, and walls so buildup does not get a head start next cycle.
  6. Reassemble and check the gasket. Reseat the lid properly so it seals and does not leak odour into the kitchen.
  7. Dispose properly and log it. Send the waste to a licensed facility, keep the receipt, and fill in the sheet.


Stock the right consumables and the job goes faster and cleaner. Keep equipment cleaning supplies, sanitation products, and the correct dishwashing detergents on hand so your team is never improvising. A clean trap is part of the same routine that keeps your whole dishwashing area sanitary.

Common problems and how to fix them

Most trap trouble announces itself before it becomes a disaster. Catch these early and you avoid the mid-service flood.

  • Slow drains at the sinks. Usually the trap is full or grease has reached the outlet. Clean it now, do not wait for the schedule.
  • Foul, sewage-like smell. Often a trap overdue for cleaning or a lid that is not sealing. Clean it and check the gasket.
  • Gurgling or backups. Grease may have moved past the trap into the drain line. You may need a plumber to clear the line.
  • Grease in the outflow. The trap is undersized or overdue, or detergents are emulsifying the grease. Review sizing and products.
  • Leaking lid. A worn or misseated gasket. Replace it and reseat the lid so it seals fully.

If problems keep coming back even with a clean trap, the unit may be the wrong size for your kitchen, and that is worth fixing properly. Browse grease traps and interceptors or the wider equipment shop, and size the new unit against your fixtures and local code before you buy.

Please note: This article is general information only and is not plumbing, engineering, or legal advice. Grease trap sizing, cleaning intervals, waste disposal, and record-keeping rules are set by your local municipality and provincial code and vary by location. Always confirm current requirements with your municipality and use a licensed professional where required. Canada Food Equipment is not liable for outcomes from actions taken based on this content.

Download the free quick guide

Save this as a PDF to keep on hand.

Grease Trap Maintenance Routine (PDF)

Frequently asked questions

How often should a restaurant clean its grease trap?

The common rule of thumb is to clean a grease trap before the combined fats, oils, grease, and solids reach 25 percent of the trap’s depth. For a busy kitchen that often lands at every two to four weeks for a small under-sink unit, and on a longer cycle for a larger in-ground interceptor. The real answer depends on your volume, your menu, and your local bylaw, some of which set a fixed maximum interval. The safest approach is to track how fast yours fills for a few cycles, then set a schedule with a margin so you never hit that 25 percent line.

What happens if you do not maintain a grease trap?

Grease builds past the trap and into your drain lines and the city sewer. Inside the restaurant that means slow drains, backups, foul odours, and the kind of overflow that shuts a kitchen mid-service. Outside, hardened grease blocks municipal sewers and can trigger fines that run into tens of thousands of dollars under local sewer bylaws. On top of that, a neglected trap is a health inspection liability. None of it is cheap, and all of it is preventable with a simple cleaning routine.

Can I clean a grease trap myself or do I need a professional?

Small under-sink and countertop traps can often be cleaned in-house if your team is trained, gloved, and follows a safe routine. Larger in-ground interceptors usually need a licensed waste hauler with a pump truck, because the volume and the disposal rules are beyond a manual scoop. Either way, the grease you remove is regulated waste and cannot go down a drain or into regular trash. Check your local bylaw, many municipalities require records of who cleaned the trap and where the waste went.

Where does the grease go after it is removed?

Collected fats, oils, and grease are regulated waste, so they go to a licensed disposal or rendering facility, never down a drain, into a storm sewer, or in the regular garbage. Many haulers recycle it into products like biodiesel or industrial feedstock. Keep your disposal receipts, because inspectors and municipal sewer programs often ask for proof that the waste was handled properly. Treating grease as trash, or worse, pouring it out, is exactly the behaviour that bylaws and pretreatment programs exist to stop.

What size grease trap does my restaurant need?

Sizing is based on the flow rate through your fixtures, the number of seats or meals you serve, and your local code, which is why it is set by a plumber or engineer rather than guesswork. Too small and it fills constantly and lets grease slip through; too large and you may struggle to clean it on a sensible cycle. If you are opening, expanding, or replacing a unit, get the size confirmed against your fixtures and your municipal requirements before you buy, then build the cleaning schedule around the capacity you actually have.

Sources and references

Your next step: find your trap’s 25 percent point, set a written schedule with a margin, and put a log sheet on the wall above it. That one routine prevents almost every grease emergency. If your trap keeps causing trouble or you are not sure it is sized right, talk to Canada Food Equipment and we will help you sort the equipment side out.

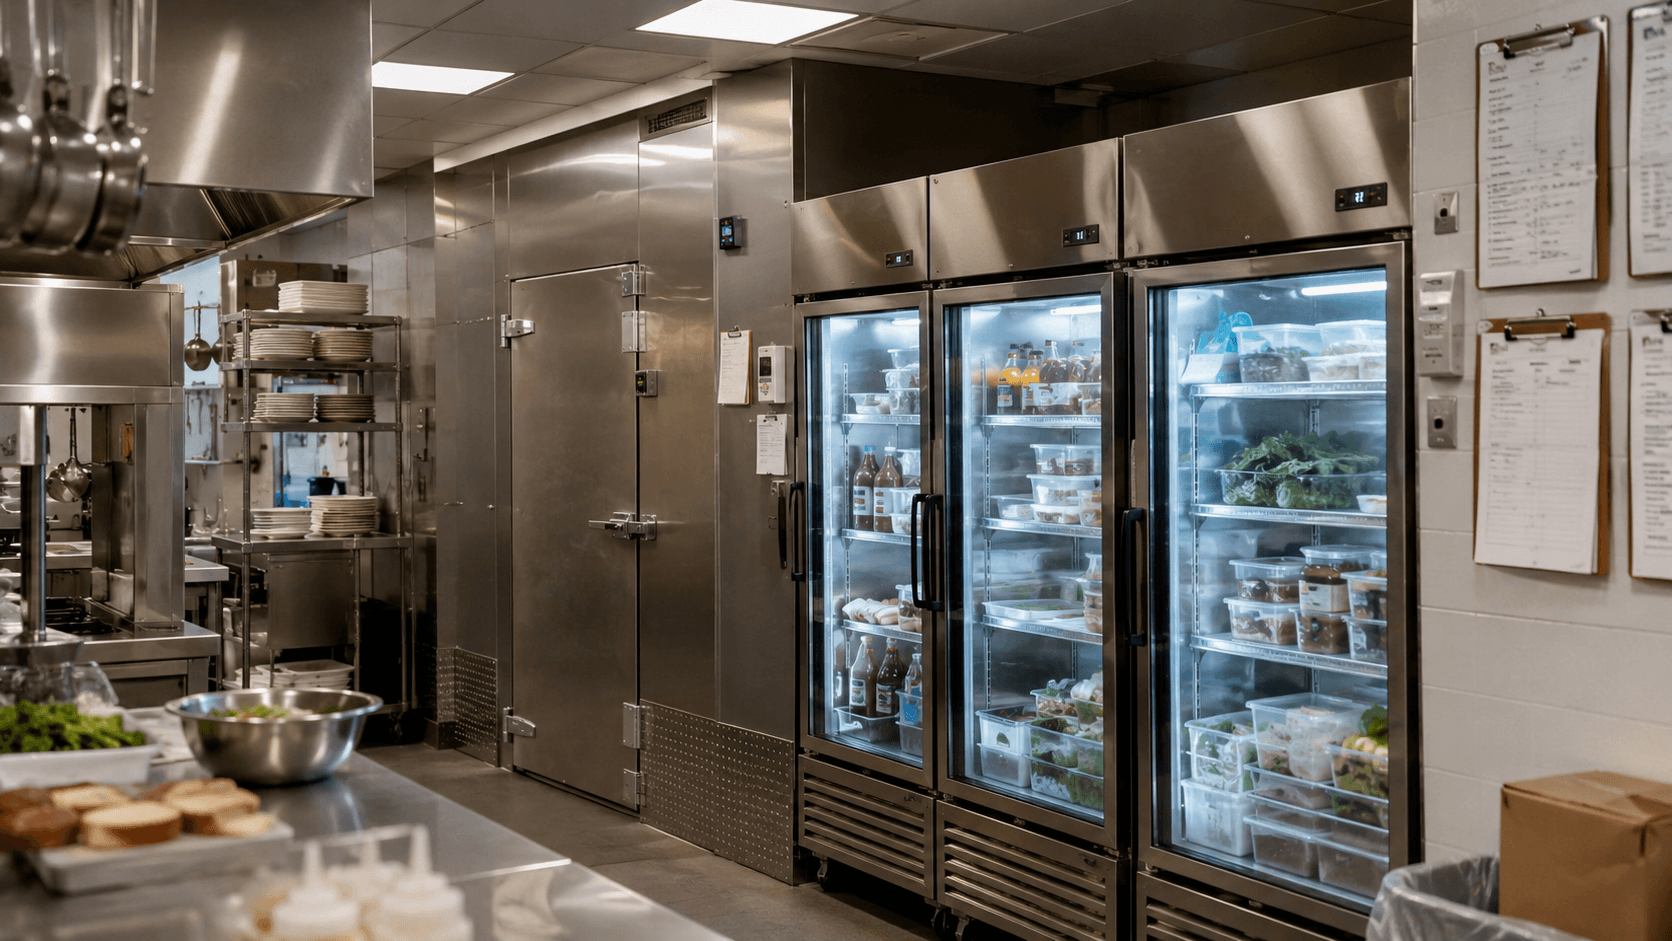
Commercial refrigeration units operating efficiently in a professional restaurant kitchen

How to Reduce Commercial Refrigeration Energy Costs (Maintenance Tips)

Commercial refrigeration is the single biggest energy cost in most restaurant and food service operations, accounting for 30-45% of total electricity consumption. Unlike lighting or HVAC, refrigeration runs 24 hours a day, 365 days a year, never stopping between services or overnight. A walk-in cooler running just 10% less efficiently than it should costs a typical Canadian restaurant $400-$1,200 extra per year.

The good news? Most commercial refrigeration energy savings don’t require expensive equipment replacement. Many of the most effective interventions are operational changes or low-cost maintenance tasks that can be implemented by your staff immediately. Here are the most practical ways to reduce your commercial refrigeration energy costs using the equipment you already have.

The True Cost of Inefficiency

A typical full-service restaurant might be running $5,000-$10,000 per year in refrigeration electricity costs alone. Reducing that by even 20% through better maintenance saves $1,000-$2,000 per year. For a restaurant operating on 5-10% net margins, $2,000 in energy savings is equivalent to generating $20,000-$40,000 in additional revenue.

Beyond the hydro bill, there are serious maintenance benefits. Inefficient units run their compressors harder and longer, generating more heat and accelerating wear. Keeping a unit running efficiently extends the interval between major repairs, saving you from a $1,500-$3,500 emergency compressor replacement.

Tips 1-2: Gaskets, Seals, and Door Discipline

Tip 1: Perform the Dollar-Bill Test. Door gaskets are the rubber or vinyl seals around the perimeter of refrigerator doors. When they harden or crack, cold air escapes continuously. Perform the dollar-bill test monthly: close the door on a piece of paper and try to pull it out. If the paper slides out easily without resistance, the gasket is failing. Replacement gaskets cost $40-$150 and typically pay for themselves in energy savings within 3-6 months.

Tip 2: Minimize Door Open Time. This is purely operational but makes a massive difference. Equip staff with protocols: install PVC strip curtains on walk-in doors (these plastic barriers reduce cold air loss by up to 40% in high-traffic coolers), enforce a policy about closing doors promptly, and organize interior shelving so staff aren’t leaving the door wide open while searching for ingredients.

Commercial refrigerator gasket inspection and maintenance for energy efficiency

Tips 3-4: Condenser Coils and Airflow Management

Tip 3: Clean Condenser Coils Quarterly. When condenser coils are coated with kitchen grease and dust, their ability to transfer heat is severely reduced. The compressor must run longer and at higher pressure. Cleaning coils is straightforward: use a stiff refrigeration coil brush and a vacuum. Moving from annual to quarterly cleaning can reduce energy consumption by 10-20% on neglected units.

Tip 4: Clear the Airflow. Condenser coils need clear airflow on both the intake and exhaust sides. In many commercial kitchens, boxes are stacked against refrigeration units, suffocating the compressor. Ensure there’s at least 6 inches of clearance around condenser coils and that exhaust air from one unit isn’t blowing directly into another.

Watch: Restaurant Energy Efficiency Tips – Refrigeration

Tips 5-6: Temperature Settings and Thermostat Calibration

Tip 5: Do Not Set It Colder Than Necessary. There’s a misconception that running refrigeration colder is always better. Running a walk-in cooler at 32°F instead of the optimal 36-38°F increases energy consumption by roughly 8-12% without meaningful food safety benefit. Verify your equipment is set strictly to the minimum safe temperature recommended by Health Canada.

Tip 6: Calibrate Thermostats. Commercial refrigeration thermostats drift over time. A unit that reads 36°F at the control panel may actually be holding 28°F (wasting energy). Use a calibrated digital thermometer to verify actual temperatures against the thermostat reading. If they differ, have a technician recalibrate it.

When It Is Time to Upgrade (and Get Rebates)

If your refrigeration units are more than 10-15 years old, simple maintenance might no longer be enough. Older compressors and shaded-pole fan motors draw significantly more electricity than modern, Energy Star certified models equipped with EC (electronically commutated) motors.

Looking to replace an old, inefficient unit?

The wrong purchase will cost you in high energy bills for the next decade. Before you buy, read our comprehensive Commercial Refrigerator Buying Guide for Canadian Restaurants to learn which configurations, brands, and compressor locations (Top vs. Bottom) save the most money over time.

The good news is that Canadian utility companies (like Hydro Quebec, Ontario Hydro, and BC Hydro) offer significant rebates for upgrading to Energy Star commercial refrigeration. The combination of utility rebates and the ongoing monthly hydro savings means a new, efficient unit often pays for itself much faster than operators expect.

Need Energy-Efficient Commercial Refrigeration?

Canada Food Equipment offers new and used commercial restaurant equipment across Canada, including top brands like True and Atosa. Get in touch for expert advice and competitive pricing.

Browse Our Inventory

Frequently Asked Questions

How much does commercial refrigeration contribute to a restaurant’s energy bill?+

Commercial refrigeration typically accounts for 30-45% of total energy consumption in a food service operation, making it the single largest energy cost category in most commercial kitchens. Walk-in coolers and freezers are the biggest consumers.

How often should commercial refrigerator door gaskets be replaced?+

Inspect door gaskets monthly using the dollar-bill test. In high-use environments, gaskets may need replacement every 1-2 years. A damaged gasket causes the compressor to run almost continuously, which can double refrigeration energy costs for that unit.

Should I turn off commercial refrigerators overnight to save energy?+

No. Cycling commercial refrigeration off overnight causes several problems. The warm-up and pull-down cycle when restarting is energy-intensive, and the temperature fluctuation causes food quality to deteriorate faster. The correct approach is to minimize door openings and ensure tight seals.

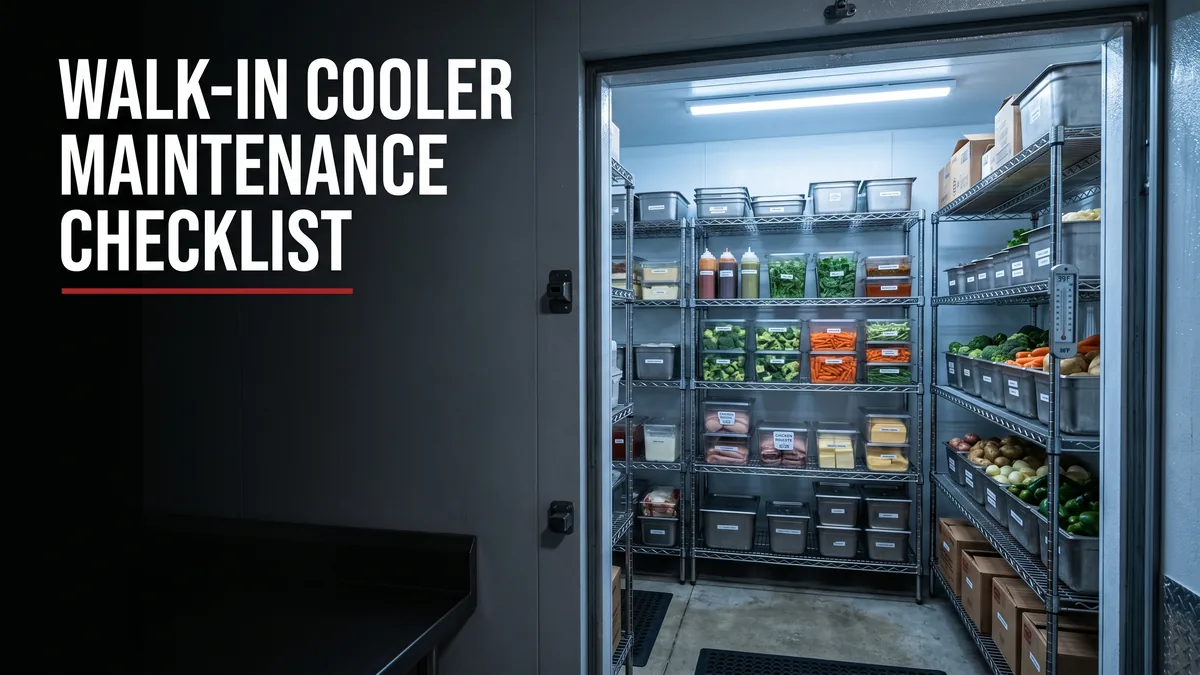
Walk-in cooler maintenance checklist, the interior of a clean stocked commercial walk-in cooler

A Restaurant Owner’s Checklist for Walk-In Cooler Maintenance

Keeping cold food at 4 C or below is not a suggestion; it is the line that decides whether your inventory is safe to serve. The Canadian Food Inspection Agency builds its whole food-safety guidance for industry around that temperature control, and your walk-in cooler is the single biggest piece of equipment standing between you and a spoiled order or a failed inspection. A little routine maintenance keeps it running cold, cheap, and reliable. If your unit is past saving, our range of commercial refrigeration equipment can help, but most coolers just need a regular checklist, and that is what this guide gives you.

Why a maintenance routine pays off

Here is the honest truth: a walk-in cooler will run for years with almost no attention, right up until the morning it does not, and that morning is always the worst possible one. A clogged condenser coil or a worn door gasket does not announce itself. It just quietly makes the unit work harder, run warmer, and burn more power, until something gives out during a heat wave or a Friday rush.

A short, repeatable routine catches those problems while they are still cheap. It also keeps your energy bill down, since a clean, well-sealed cooler can hold temperature with far less effort. For the bigger picture on specs and food-safe temperatures, our guide to walk-in cooler temperature requirements in Canada is a good companion to this checklist.

Interior of a clean, well-organized commercial walk-in cooler stocked with food in a restaurant
A clean, well-sealed walk-in holds temperature with far less energy and far fewer surprises.

Did you know

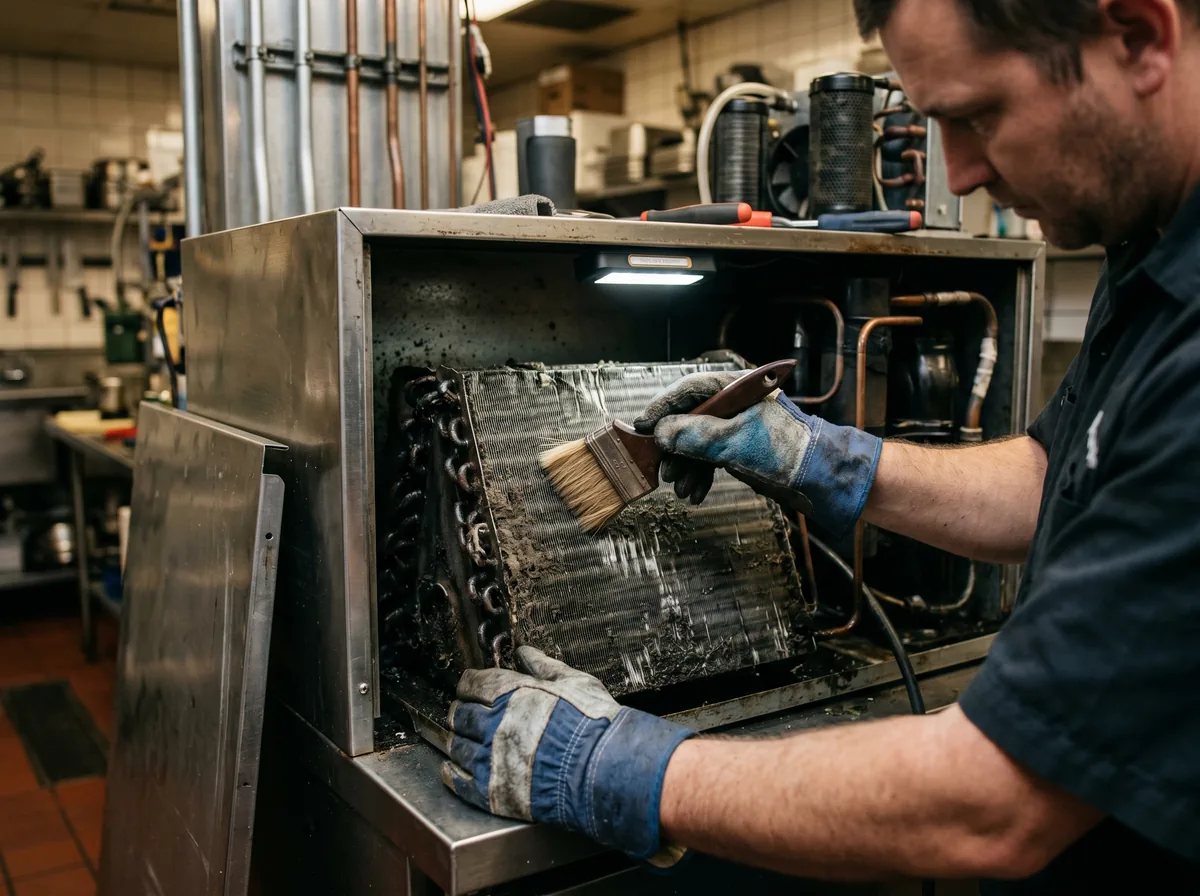
A dirty condenser coil is one of the most common reasons a walk-in struggles to stay cold. When dust and grease blanket the coil, the unit cannot shed heat properly, so the compressor runs longer and hotter to do the same job. That means a higher power bill and a shorter compressor life. A coil that gets cleaned on a regular schedule can keep a cooler running efficiently for years longer than one that never gets touched.

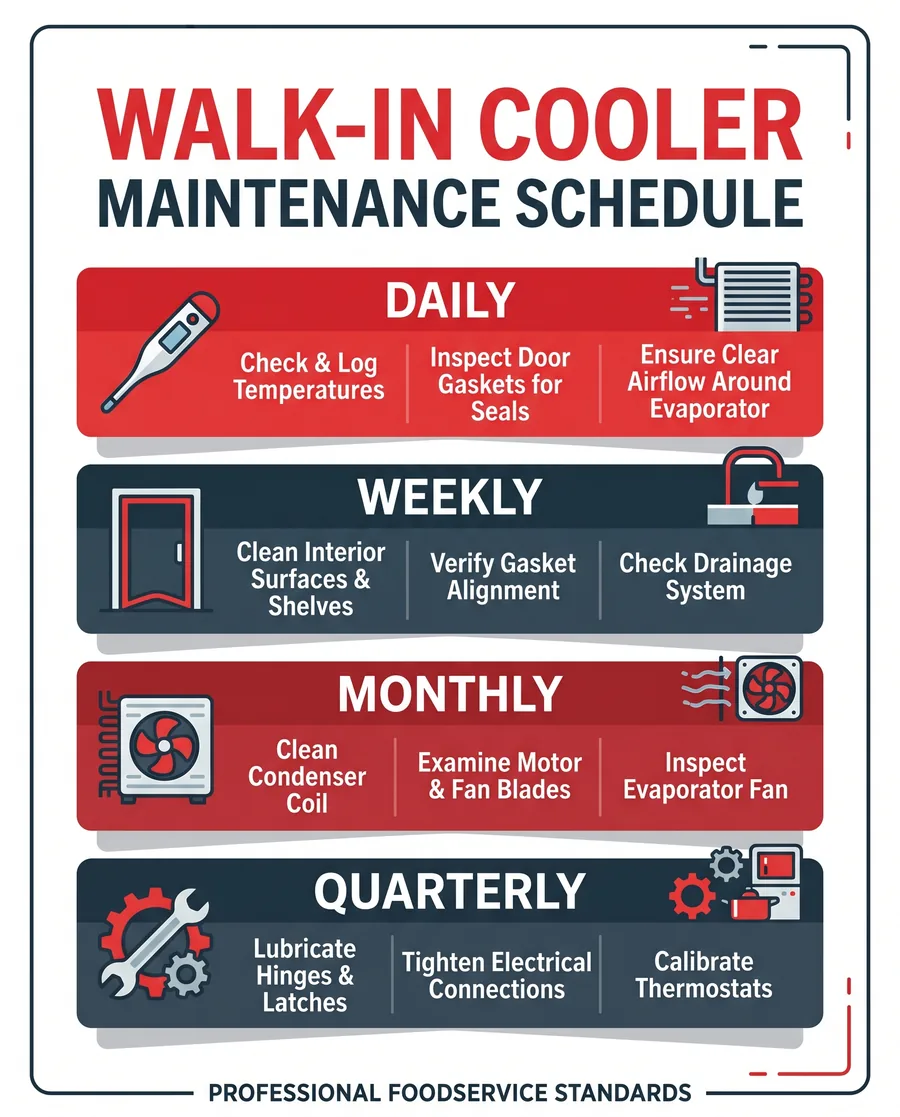
Daily checks

These take two minutes and you can fold them into opening or closing. Whoever is on shift can do them.

  • Read the thermometer. Confirm the cooler is holding 4 C or below and log it. A written log is your proof of temperature control if an inspector asks.
  • Listen and feel at the door. A door that does not seal, or that someone propped open during a delivery, is the fastest way to lose your cold air. Close it fully and check the gasket grabs.
  • Glance at the floor. Water or ice on the floor near the evaporator usually means a drain or defrost issue. Catch it early before it becomes a slip hazard or a bigger repair.
  • Keep airflow clear. Make sure boxes are not stacked against the evaporator fan or blocking the cold air path. Crowding the unit makes it work harder and cool unevenly.

Weekly checks

Please note: This article is for general guidance only and is not a substitute for your equipment manual, your manufacturer, or a licensed professional. Canada Food Equipment is not liable for any damage, injury, or cost resulting from action taken based on this content. Commercial cooking and refrigeration equipment involves gas, high voltage, hot oil, and refrigerant. Anything beyond routine cleaning, especially gas, electrical, or sealed refrigeration work, must be handled by a qualified technician, and you should always follow your local food-safety and health-authority requirements.

  • Clean and inspect the door gaskets. Wipe them down and look for tears, gaps, or hardened spots. A simple test: close the door on a sheet of paper; if it slides out easily, the seal is weak.
  • Wipe down interior surfaces. Clean shelves, walls, and the floor to keep mold and bacteria in check and to spot any new leaks or damage.
  • Check the door closer and hinges. The door should swing shut and latch on its own. A door that hangs open even a crack will cost you cold air all day.
  • Confirm nothing is icing up. Light frost on the evaporator is normal between defrost cycles; heavy ice build-up is not and points to a defrost or airflow problem.

Pro tip: date your gasket check

Door gaskets are the cheapest part of a walk-in and the one that fails most often, so do not wait for them to crack. Keep a simple log of when you last replaced each gasket, and budget to swap them on a schedule rather than only when they fail. A fresh gasket can cut energy waste right away, and it takes minutes to install. Treat it as routine, the same way you would change a filter, and you will avoid a lot of warm-air leaks.

Infographic showing daily, weekly, monthly and quarterly walk-in cooler maintenance tasks
The walk-in cooler maintenance schedule at a glance: daily, weekly, monthly, and quarterly tasks.
Restaurant Walk In Cooler Food Safety

Monthly checks

Once a month, give the cooler a closer look. This is where you head off the expensive failures.

  1. Clean the condenser coil. With the power safely off, clear dust and grease from the condenser coil so the unit can shed heat. This is the single most valuable monthly task for efficiency and compressor life. If the coil is heavily fouled or hard to reach, have a technician handle it.
  2. Clean the evaporator coil and check the drain line. Make sure the condensate drain is clear so water does not back up and freeze inside the unit.
  3. Inspect the fan blades and motors. Listen for new noises or wobble. A failing fan motor strains the whole system.
  4. Verify the thermometer against a known-good one. Thermostats drift. Spot-check the display reading so you can trust your daily logs.
A technician brushing dust from the condenser coil of a commercial walk-in cooler refrigeration unit
Cleaning the condenser coil is the single most valuable monthly task for efficiency and compressor life.

Quarterly and seasonal checks

A few times a year, bring in a refrigeration technician for the work that goes beyond cleaning. A modest service visit is far cheaper than an emergency call when the unit dies mid-service.

  • Professional refrigeration service. Have a qualified technician check refrigerant levels, electrical connections, and the compressor. Refrigerant and electrical work must be done by a licensed pro, not in-house.
  • Calibrate controls and defrost timers. Make sure defrost cycles run correctly so you avoid ice build-up without warming the box.
  • Inspect insulation, panels, and the floor. Look for damaged panels or gaps that let warm air and moisture seep in.
  • Plan for the seasons. Hot, humid summer months work refrigeration hard. Schedule a service visit before peak season so the cooler is in top shape when you need it most. Energy-efficient, ENERGY STAR rated refrigeration also rides out heat waves with less strain; you can check Canadian options through Natural Resources Canada.

Warning signs you should not ignore

Red flag: call a technician now

  • The cooler cannot hold 4 C even though the door seals and the coils are clean.
  • You see heavy ice build-up on the evaporator that comes back fast after you clear it.
  • The compressor is short-cycling, running constantly, or making new grinding or buzzing noises.
  • There is water pooling inside or a drain that keeps backing up.
  • You smell something burning or electrical near the unit. Shut it down and get help.

Any of these means the cooler needs more than a checklist. Move your stock to backup refrigeration if you can, and call a refrigeration technician. If the unit is old and failing repeatedly, our commercial refrigerator buying guide can help you weigh repair against replacement.

Sources and further reading

Frequently asked questions

How often should a walk-in cooler be serviced? +

Build it in layers. Do quick visual and temperature checks every day, clean the gaskets and interior weekly, clean the condenser coil and check the drain monthly, and bring in a professional refrigeration technician a few times a year for refrigerant, electrical, and compressor checks. The daily and weekly tasks are easy for your staff to handle, while the deeper monthly cleaning and the quarterly professional service keep the system healthy. Coolers that run hard or sit in hot kitchens may need professional visits more often, so adjust the cadence to your conditions.

What temperature should a walk-in cooler hold? +

A walk-in cooler should hold food at 4 C (about 40 F) or below to keep it in the food-safe zone, which is the benchmark Canadian food-safety guidance is built around. Keep a thermometer where it is easy to read and log the temperature daily, both as a safety habit and as proof of temperature control if an inspector asks. If the cooler drifts above 4 C even with a clean coil and a sealed door, treat it as a warning sign and have it checked, because a steady creep upward usually points to a refrigeration problem worth catching early.

Why is my walk-in cooler not staying cold? +

The usual suspects, in order, are a door that is not sealing, a dirty condenser coil, blocked airflow inside, and a refrigeration fault. Start with the cheap, fast checks: confirm the door closes and the gasket seals, make sure stock is not blocking the evaporator fan, and clean the condenser coil so the unit can shed heat. If the cooler still cannot hold 4 C after those steps, the problem is likely low refrigerant, a failing compressor, or a control issue, and that calls for a licensed refrigeration technician rather than another round of cleaning.

Can I clean the condenser coil myself? +

Yes, careful coil cleaning is a reasonable in-house task as long as you cut the power to the unit first and use a soft brush or coil-safe approach so you do not bend the fins. It is genuinely one of the highest-value things you can do for efficiency and compressor life. What you should not do yourself is anything involving refrigerant, sealed-system work, or electrical repairs; those require a licensed technician by law and for safety. If the coil is packed with grease or awkward to reach, it is worth folding into a professional service visit instead of forcing it.

Is it worth repairing an old walk-in cooler or should I replace it? +

It depends on how often it fails and how much energy it wastes. A cooler that needs the occasional gasket or a routine service is almost always worth keeping. But if the compressor is on its way out, the unit cannot hold temperature even after a proper service, or your energy bills keep climbing, replacement often pays for itself through lower running costs and fewer emergencies. Compare the cost of the looming repair against a new efficient unit, and factor in the value of not losing inventory to a mid-service breakdown.

Download the free quick guide

Print our daily, weekly, monthly, and quarterly walk-in cooler maintenance checklist and post it by the unit.

Download the walk-in cooler checklist

The quick recap

  • Check the temperature and the door seal every day, and log it.
  • Clean gaskets and interior weekly; clean the condenser coil and drain monthly.
  • Book a professional refrigeration service a few times a year, especially before summer.
  • Treat ice build-up, short-cycling, or a cooler that cannot hold 4 C as a call-the-pro red flag.
  • When repairs pile up, weigh them against a new, efficient unit.

Time to upgrade your refrigeration?

A good maintenance routine keeps most walk-ins running for years. When yours has reached the end of the road, we can help you replace it. Browse our commercial refrigeration equipment and walk-in freezers, or contact our team for help choosing the right unit for your kitchen.

Gas vs electric commercial fryers, a stainless steel deep fryer station in a professional kitchen

Gas vs. Electric Commercial Fryers: Which Is Right for Your Kitchen?

Should you buy a gas or an electric commercial fryer? The honest answer is that it depends on three things: where your kitchen gets its energy, how fast you need oil to recover during a rush, and what your local utility charges per unit. Both technologies fry beautifully. The difference shows up in install cost, recovery speed, and your monthly bills. If you are weighing models right now, our range of commercial deep fryers covers both, and this guide walks through how to pick the right one for your menu and your room.

Quick take

Choose gas if you run high-volume frying, already have a gas line, and want the fastest oil recovery for back-to-back baskets. Choose electric if you have limited or no gas service, want simpler installation and more even heat, or are fitting out a smaller or mobile kitchen. Most kitchens can succeed with either; the deciding factors are volume and the utilities you already have.

Infographic comparing gas and electric commercial fryers on recovery, install, efficiency and best fit
Gas versus electric fryers at a glance: recovery speed, install needs, efficiency, and best fit.

The two options at a glance

A commercial fryer heats a vat of oil to roughly 175 C and holds it there while baskets of cold, wet food keep pulling the temperature down. The job of the burner or element is to put that heat back fast. That is the whole game, and gas and electric go about it differently.

Gas fryers burn natural gas or propane under the oil vat. They heat the oil through the tank walls or through internal tubes, and they tend to deliver a lot of raw power, which means strong recovery during a busy service. Electric fryers use heating elements that sit directly in the oil. Because the element is immersed, electric units transfer heat very efficiently and hold a steady, even temperature, which is part of why so many countertop and lower-volume models are electric.

A stainless steel commercial gas deep fryer with baskets of food in a busy restaurant kitchen
Gas fryers put out strong heat for fast oil recovery during back-to-back baskets.

Gas vs electric: side by side

Here is how the two stack up on the factors that actually affect a working kitchen. Treat this as a starting point for a conversation with your supplier, not a hard rule for every model.

FactorGas fryerElectric fryer
Oil recovery speedVery fast, strong for high volumeFast and very steady, great for consistency
Heat-up from coldQuickOften a touch slower to reach temp
Energy efficiency at the vatLower, more heat escapesHigher, immersed element heats oil directly
InstallationNeeds a gas line and proper ventingNeeds the right electrical service and outlet
Upfront cost (typical)Often lower per BTU of outputComparable; countertop models can be cheaper
Temperature evennessGoodExcellent, very stable
Best fitHigh-volume, gas-equipped kitchensSmaller, mobile, or all-electric kitchens
Cleaning and serviceBurners and venting to maintainElements often swing up for easy cleaning

Notice that neither column is all wins. Gas gives you brute recovery power but loses more heat to the room and needs venting. Electric is more efficient at the oil and easier to install, but a high-output gas unit will usually out-recover an electric one of the same size. For more on matching a fryer to your menu, see our guide on choosing the best fryer for your menu.

Gas vs Electric Deep Fryers: Which Do You Need?

What each one really costs to run

Pricing and figures note: Any prices, energy figures, or running-cost numbers on this page are general 2026 estimates for commercial equipment in Canada and are meant for planning only. What you actually pay or save depends on the make and model, your menu and volume, local utility rates, install conditions, and the quote your supplier or utility provides. Always confirm current pricing and specifications before you buy.

Operating cost comes down to two things: how efficiently the fryer turns energy into hot oil, and what you pay for that energy. Electric fryers convert a higher share of their input into useful heat at the oil, so they often look very efficient on paper. But in much of Canada, natural gas costs less per unit of energy than electricity, which can flip the math back toward gas in a high-volume kitchen.

The cleanest way to compare is to look for certified models. Both gas and electric fryers can earn an ENERGY STAR rating, which means they meet heavy-load cooking efficiency and idle-energy targets. In Canada, you can cross-check eligible products through Natural Resources Canada. A certified fryer of either fuel type wastes less energy idling between rushes, which is where a surprising amount of a fryer’s lifetime cost actually hides.

Save your money: count the idle hours

Most fryers spend more of the day holding temperature than actively cooking. That idle energy adds up. Before you pick a fuel type, estimate how many hours your fryer sits hot but unused, then favour a model with strong idle-efficiency numbers, whatever the fuel. Pair that with a good lid and a habit of switching to a lower hold temperature during slow periods, and you can trim your fryer energy bill noticeably without changing a single recipe.

People often ask: is gas or electric cheaper overall?

For a high-volume kitchen that already has a gas line, gas is often cheaper to run because natural gas tends to cost less per unit of energy than electricity in most of Canada, and gas units recover fast enough to keep up. For a low to medium volume kitchen, or one without gas service, a modern electric fryer is usually the better total value once you factor in its higher efficiency and simpler install. There is no single winner; the cheaper option is the one matched to your volume and your local utility rates.

A commercial electric countertop deep fryer with the heating element lifted up for cleaning
Electric fryers heat oil directly and many lift the element for easy cleaning.

Which fryer fits which kitchen

Step back from the spec sheet and look at your operation. The right answer usually becomes obvious once you frame it around volume and utilities.

  • High-volume restaurant or quick-service. If fries, wings, and fried items are core to your menu and you already have gas, a floor-standing gas fryer with strong recovery is hard to beat.
  • Cafe, bar, or low to medium volume. An electric fryer, often countertop, gives you steady temperature, easy cleaning, and a simple plug-and-go install when frying is a side act, not the headliner.
  • Food truck or mobile kitchen. Power and space drive the call. Many trucks run propane for fast recovery off-grid; others go electric when shore power or a generator can handle the load.
  • New build or full renovation. If you are running new utilities anyway, decide on fuel before the trades arrive, because adding a gas line or upgrading electrical service later is expensive.

If your kitchen is built around live-flame cooking, it is worth thinking about your whole line at once. The same gas-versus-electric trade-offs show up on your stovetop, which we cover in our piece on gas versus electric commercial ranges.

Edge cases and common mistakes

Please note: This article is for general guidance only and is not a substitute for your equipment manual, your manufacturer, or a licensed professional. Canada Food Equipment is not liable for any damage, injury, or cost resulting from action taken based on this content. Commercial cooking and refrigeration equipment involves gas, high voltage, hot oil, and refrigerant. Anything beyond routine cleaning, especially gas, electrical, or sealed refrigeration work, must be handled by a qualified technician, and you should always follow your local food-safety and health-authority requirements.

  • Buying more BTUs or watts than you need. Oversizing wastes energy and money. Match output to your real peak, not your busiest day ever.
  • Forgetting the hood and venting. Gas fryers produce combustion byproducts and need proper ventilation. Confirm your hood and make-up air can handle the unit before you buy.
  • Ignoring electrical capacity. A big electric fryer can need a dedicated circuit and specific voltage. Have an electrician confirm your panel can carry it.
  • Skipping sanitation and food-safety basics. Choose equipment built for commercial cleanability and run it within your food-safety program. The Canadian Food Inspection Agency outlines the food-safety expectations every foodservice operator works under.
  • Overlooking maintenance. Whatever you choose, oil management and regular service decide how long it lasts. Our complete deep fryer maintenance guide walks through the routine.

Sources and further reading

Frequently asked questions

Do gas fryers really recover oil temperature faster than electric? +

Generally yes, especially at higher output levels. Gas burners can deliver a large amount of raw heat quickly, which helps the oil bounce back to frying temperature after you drop in cold, wet food. That fast recovery is why high-volume kitchens lean toward gas. Electric fryers recover well too and hold temperature very evenly, but a big gas unit will usually out-recover an electric one of similar size during back-to-back baskets. If your menu hammers the fryer all day, recovery speed is a real reason to consider gas.

Is an electric commercial fryer more energy efficient? +

At the oil vat, yes. Electric fryers use an immersed heating element, so a higher share of the energy goes straight into the oil instead of escaping around the tank. That makes them efficient on paper. The catch is energy price: in much of Canada, natural gas costs less per unit than electricity, so a gas fryer can still be cheaper to run despite lower efficiency. The smartest move is to compare ENERGY STAR rated models of both types and weigh their efficiency against your local utility rates.

Can I switch from a gas fryer to an electric one, or the other way? +

You can, but it is not always a simple swap. Going from electric to gas means adding or confirming a gas line and the right venting, which is a job for licensed trades. Going from gas to electric usually means confirming your electrical panel and circuits can carry the load, since a large electric fryer may need a dedicated, higher-voltage circuit. Before you commit to a switch, have the relevant professional check your utilities. Often it is easier to choose the fuel that matches your existing services.

Which fryer is better for a small kitchen or food truck? +

For tight or mobile setups, an electric countertop fryer is often the easiest choice because it installs with the right outlet and circuit, holds steady temperature, and is simple to clean. That said, many food trucks run propane gas fryers when they need fast recovery away from a strong power source. The deciding factor is your available power: if you have reliable electrical capacity, electric keeps things simple; if you are working off propane or a generator, a compact gas fryer can make more sense.

Does the fryer fuel type change the taste of the food? +

No. The food cooks in hot oil, not in the flame or the element, so a properly maintained gas fryer and a properly maintained electric fryer at the same temperature will produce the same result. What actually affects taste and quality is oil condition, frying temperature, and how consistently the fryer holds that temperature during a rush. Clean oil, accurate thermostats, and good recovery matter far more to your fries than whether the heat came from gas or electricity.

Download the free quick guide

Take our printable gas versus electric comparison and buying checklist to your next equipment decision.

Download the fryer buying checklist

Not sure which fryer your kitchen needs?

The verdict: gas wins on recovery for high-volume, gas-equipped kitchens, while electric wins on efficiency and easy installation for smaller or all-electric setups. Match the fuel to your volume and your utilities and you will not go wrong. Browse our selection of commercial deep fryers, stock up on fryer baskets and filters, or contact our team and we will help you spec the right unit.

Convection vs. Conventional vs. Combi Ovens: Which Is Right for Your Kitchen?


The oven decision is one of the most consequential equipment choices in any commercial kitchen. Get it right and you have a workhorse that supports your menu for a decade. Get it wrong and you’re fighting the equipment every service – uneven cooking, capacity bottlenecks, unnecessary energy costs, and a menu that doesn’t quite deliver what you envisioned. The choice between commercial convection vs. conventional oven, or the addition of a combi oven, depends on your menu type, volume, budget, kitchen footprint, and the skills of your kitchen team. This guide breaks down all three oven types in practical terms, with the specific trade-offs that matter to commercial operators in Canada.

Conventional Ovens: The Baseline for Commercial Baking

Conventional ovens – also called standard or deck ovens – heat food through radiant heat from elements or gas burners positioned above and/or below the food. The air inside the cavity is heated and rises naturally through convection, but there’s no fan forcing circulation. This creates temperature variation within the oven: the top is typically hotter than the bottom, and the back runs hotter than the front near the door.

In a commercial context, pure conventional ovens have largely been replaced by convection units for most applications. The primary exception is the deck oven, which is a specialized conventional design where food sits directly on a solid stone or ceramic deck rather than on a wire rack. Deck ovens are the preference for artisan bread, pizza, and certain pastries where direct bottom heat and steam retention are critical to crust development.

The advantages of conventional/deck ovens: lower initial cost for simple units, no moving parts to fail, the ability to generate radiant heat patterns that convection can’t replicate, and a baking environment that experienced bakers know intimately. A skilled baker knows exactly how to rotate product in a deck oven to compensate for hot spots.

The disadvantages: longer cooking times, more skill required to achieve consistent results, limited capacity relative to their footprint, and higher energy consumption per unit of output compared to convection. For most commercial applications outside artisan baking and pizza, a conventional oven is not the optimal choice.

Commercial combi oven using steam and convection cooking in a professional kitchen

Convection Ovens: The Commercial Kitchen Standard

Commercial convection ovens use one or more fans to continuously circulate heated air throughout the cavity. This forced air movement eliminates the temperature stratification of conventional ovens, transferring heat to food surfaces much more efficiently. The result: faster cooking times (typically 25-30% faster than conventional), better color development, lower required temperatures, and more consistent results across the entire oven rack.

For most commercial kitchens – restaurants, catering operations, institutional foodservice, and retail bakeries – a commercial convection oven is the backbone of the cooking line. They’re reliable, relatively simple to maintain, available in a wide range of sizes and configurations, and the performance is well understood by the vast majority of commercial cooks and bakers.

Standard commercial convection ovens come in countertop and full-size floor models. Full-size ovens typically accommodate standard 18×26-inch sheet pans and come in single, double, or triple deck configurations. For a high-volume bakery or catering operation, double-stack convection ovens (two independently controlled ovens stacked vertically) provide tremendous throughput in a relatively compact footprint.

The trade-offs of convection ovens: the circulating air can cause problems for some delicate products. Custards can form a skin, souffles can collapse, and very light products (meringues, choux pastry) can be blown around on the tray. Experienced bakers address this by using lower fan speeds or intermittent fan settings available on many modern commercial convection ovens. Products also need to be oriented consistently for even results – pans loaded with the same orientation and spacing will cook more evenly than randomly arranged trays.

Watch: Convection vs. conventional ovens explained

Combi Ovens: The Versatile Investment

A combi oven (combination oven) integrates convection heat with steam injection in a single unit. The operator can cook in three modes: pure convection (dry heat, like a standard convection oven), pure steam (like a commercial steamer), or combination mode (convection heat and steam simultaneously). This combination mode is where the combi truly distinguishes itself – the steam prevents moisture loss while convection heat drives cooking speed and browning.

The practical implications of combination mode are significant. Roasting a prime rib in combi mode gives you the caramelized crust of roasting while retaining dramatically more moisture than dry convection alone. You can hold cooked proteins at temperature with periodic steam injection, preventing the drying and weight loss that happens in conventional holding equipment. Regenerating (reheating) pre-cooked food in combi mode delivers results closer to freshly cooked than any other reheating method.

Modern combi ovens from manufacturers like Rational, Alto-Shaam, Henny Penny, and Convotherm include sophisticated programming capabilities. You can create and store cooking programs for each menu item, ensuring consistent results regardless of which cook operates the oven. Some models include self-cleaning systems, core temperature probes, and HACCP data logging for food safety documentation.

The cost and complexity are the primary barriers. Entry-level commercial combi ovens start around $5,000-$8,000 for small countertop units, with full-size floor models from leading brands running $15,000-$30,000 or more. Installation requires both electrical (often 3-phase) and plumbing connections for water supply and drainage. Maintenance is more involved than a standard convection oven, particularly the descaling of the steam generator in hard water areas.

Artisan baker loading bread into a commercial deck oven for traditional baking

Side-by-Side Comparison

Here’s how the three oven types compare across the key decision factors for commercial operators:

Factor Conventional/Deck Convection Combi
Initial Cost $1,500 – $15,000 $1,500 – $8,000 $5,000 – $30,000+
Cooking Speed Standard 25-30% faster 20-40% faster
Moisture Control None None Excellent
Best For Artisan bread, pizza General baking, roasting Proteins, reheating, diverse menus
Maintenance Low Low – Medium Medium – High
Installation Gas or electric Gas or electric Electric + plumbing required

Which Oven Type Is Right for Your Operation?

The answer depends on what you’re cooking, how much you’re cooking, and what your budget and kitchen infrastructure support. There’s no universal right answer – only the right answer for your specific operation.

Choose convection if: You run a full-service restaurant kitchen with a broad menu that includes roasting, baking, and reheating. Convection is the versatile workhorse that handles the widest range of everyday cooking tasks at a price point most operations can justify. If you’re equipping a first commercial kitchen on a budget, a quality used commercial convection oven is almost certainly your best starting point.

Add a deck oven if: Pizza or artisan bread is a significant part of your business. The stone deck and radiant heat pattern create crust characteristics that convection simply cannot replicate. Many successful pizza and bakery operations run a combination of a deck oven for the signature product and a convection oven for everything else.

Choose a combi oven if: You’re running a hotel kitchen, catering operation, or high-volume restaurant where menu diversity and production efficiency are paramount, AND your budget and kitchen infrastructure can support it. The ROI calculation for a combi usually requires significant volume and menu diversity to justify the price premium over convection. For smaller operations, a well-chosen convection oven delivers 80% of the results at 30% of the cost.

Cost, Installation, and Maintenance Considerations

When budgeting for any commercial oven, the purchase price is just the starting point. Installation costs for gas ovens include the gas line connection, CSA-approved flexible connector, and ventilation requirements. Electric ovens above 240V require a dedicated circuit and potentially an electrical panel upgrade. Combi ovens add plumbing costs for the water supply and drain line, plus water treatment if your water is hard.

Ventilation is often overlooked in the budget. Most commercial ovens require a Type 1 or Type 2 commercial hood with make-up air. Hood installation in a new location can cost $3,000-$10,000 or more depending on complexity, and the mechanical permit process can add weeks to your timeline. Verify ventilation requirements before selecting equipment – this can determine which oven type is actually feasible in your space.

For maintenance, convection ovens are the most straightforward – fan motor service, door gasket replacement, and heating element testing are the primary tasks. Combi oven maintenance requires additionally monitoring water quality and softener systems, descaling the steam generator, and cleaning the drain tray system. Budget for a semi-annual professional service visit for combi ovens, versus annual for most convection units.

The used market can significantly change the cost calculus. A quality used commercial convection oven from a reputable brand (Blodgett, Hobart, BKI, Vulcan) in good mechanical condition can be purchased for $800-$2,500 – a fraction of new pricing. Used combi ovens are also available, though the sophistication of their systems means a pre-purchase inspection by a qualified technician is strongly recommended before buying.

Need Commercial Kitchen Equipment?

Canada Food Equipment offers new and used commercial restaurant equipment across Canada. Get in touch for expert advice and competitive pricing.

Browse Our Inventory

Frequently Asked Questions

What is the main difference between a convection and conventional oven?+

A convection oven uses a fan to circulate hot air continuously around the food, creating even heat distribution and faster cooking. A conventional oven relies on radiant heat from elements above and below, which creates hot spots and can result in uneven cooking. Convection ovens generally cook 25% faster and at 25 degrees F lower than conventional ovens for the same results.

What is a combi oven and why is it more expensive?+

A combi oven combines convection heat with steam injection, allowing you to cook in convection mode, steam mode, or a combination of both simultaneously. The added complexity of the steam generation system, water connections, and sophisticated controls makes combi ovens significantly more expensive – typically $5,000 to $30,000+ depending on capacity. The versatility justifies the cost for high-volume operations that need multiple cooking methods from a single piece of equipment.

Can I use a convection oven for baking?+

Yes, convection ovens are excellent for baking cookies, pastries, and bread where even browning is desired. However, the circulating air can cause souffles, delicate cakes, and custards to set unevenly or collapse. Many commercial bakers use convection for production baking but switch to conventional settings for delicate items. Deck ovens remain the gold standard for artisan bread.

What types of restaurants benefit most from a combi oven?+

Hotels, catering operations, healthcare foodservice, and high-volume restaurants with diverse menus benefit most. The combi’s ability to roast, steam, bake, proof, and regenerate in one unit dramatically reduces equipment footprint and labor. For a la carte restaurant kitchens focused on a specific cuisine, the additional cost may not be justified compared to specialized individual ovens.

How much energy does a commercial convection oven use compared to conventional?+

A commercial convection oven typically uses 10-15% less energy than a comparable conventional oven for the same output because shorter cooking times and lower temperatures compensate for the fan motor’s energy draw. Combi ovens use more energy overall due to their greater capability, but the energy per unit of food produced can be competitive because of their efficiency in steam mode.

What size commercial oven do I need for my restaurant?+

As a general guideline, a full-size commercial convection oven with two to three decks handles high-volume production baking or roasting for 50-100 covers. For a la carte service, a half-size or countertop convection oven may suffice for a small operation. Combi ovens are rated by tray capacity (6-pan, 10-pan, 20-pan, etc.) – calculate based on your peak-hour plate count and menu mix.

Can a combi oven replace a commercial steamer?+

Yes – combi ovens in pure steam mode function as commercial steamers and can replace standalone steam units in most applications. This is one of the primary space and cost justifications for combi ovens in smaller kitchens. The steam quality and temperature control in modern combi ovens is comparable to standalone steamers at a similar price point.

What maintenance does a commercial combi oven require?+

Combi ovens require more maintenance than convection ovens due to their water systems. Daily descaling of the steam generator (or use of automatic descaling cycles if equipped) is essential in hard water areas. The door gasket, drain line, and water filter require regular inspection and replacement. Plan for professional service every 6-12 months to check the heating elements, fan motor, and steam injection components.