
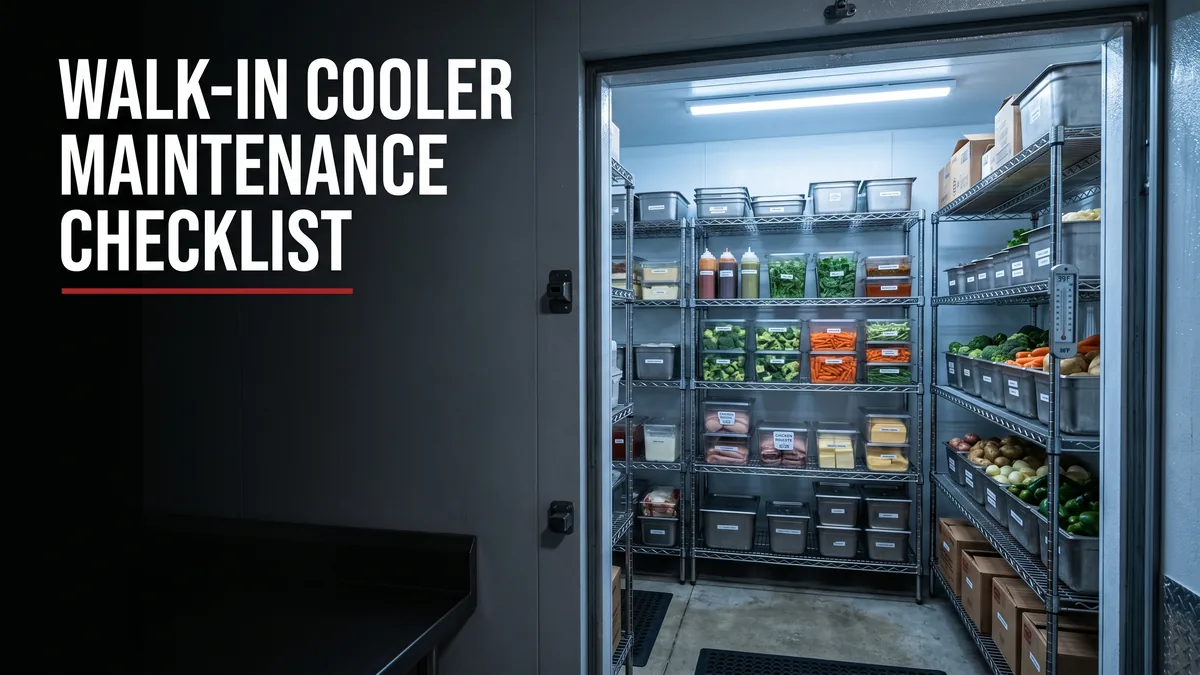
Keeping cold food at 4 C or below is not a suggestion; it is the line that decides whether your inventory is safe to serve. The Canadian Food Inspection Agency builds its whole food-safety guidance for industry around that temperature control, and your walk-in cooler is the single biggest piece of equipment standing between you and a spoiled order or a failed inspection. A little routine maintenance keeps it running cold, cheap, and reliable. If your unit is past saving, our range of commercial refrigeration equipment can help, but most coolers just need a regular checklist, and that is what this guide gives you.
Why a maintenance routine pays off
Here is the honest truth: a walk-in cooler will run for years with almost no attention, right up until the morning it does not, and that morning is always the worst possible one. A clogged condenser coil or a worn door gasket does not announce itself. It just quietly makes the unit work harder, run warmer, and burn more power, until something gives out during a heat wave or a Friday rush.
A short, repeatable routine catches those problems while they are still cheap. It also keeps your energy bill down, since a clean, well-sealed cooler can hold temperature with far less effort. For the bigger picture on specs and food-safe temperatures, our guide to walk-in cooler temperature requirements in Canada is a good companion to this checklist.

Did you know
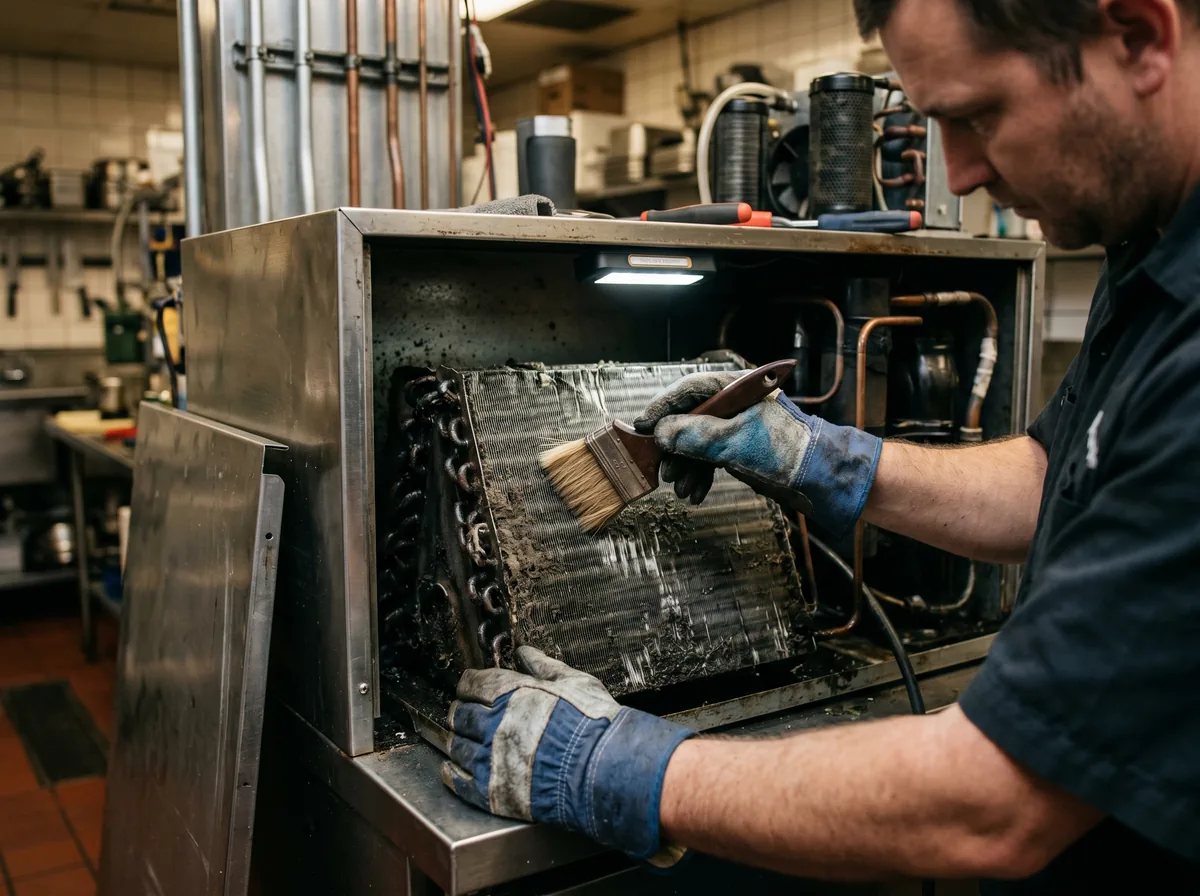
A dirty condenser coil is one of the most common reasons a walk-in struggles to stay cold. When dust and grease blanket the coil, the unit cannot shed heat properly, so the compressor runs longer and hotter to do the same job. That means a higher power bill and a shorter compressor life. A coil that gets cleaned on a regular schedule can keep a cooler running efficiently for years longer than one that never gets touched.
Daily checks
These take two minutes and you can fold them into opening or closing. Whoever is on shift can do them.
- Read the thermometer. Confirm the cooler is holding 4 C or below and log it. A written log is your proof of temperature control if an inspector asks.
- Listen and feel at the door. A door that does not seal, or that someone propped open during a delivery, is the fastest way to lose your cold air. Close it fully and check the gasket grabs.
- Glance at the floor. Water or ice on the floor near the evaporator usually means a drain or defrost issue. Catch it early before it becomes a slip hazard or a bigger repair.
- Keep airflow clear. Make sure boxes are not stacked against the evaporator fan or blocking the cold air path. Crowding the unit makes it work harder and cool unevenly.
Weekly checks
Please note: This article is for general guidance only and is not a substitute for your equipment manual, your manufacturer, or a licensed professional. Canada Food Equipment is not liable for any damage, injury, or cost resulting from action taken based on this content. Commercial cooking and refrigeration equipment involves gas, high voltage, hot oil, and refrigerant. Anything beyond routine cleaning, especially gas, electrical, or sealed refrigeration work, must be handled by a qualified technician, and you should always follow your local food-safety and health-authority requirements.
- Clean and inspect the door gaskets. Wipe them down and look for tears, gaps, or hardened spots. A simple test: close the door on a sheet of paper; if it slides out easily, the seal is weak.
- Wipe down interior surfaces. Clean shelves, walls, and the floor to keep mold and bacteria in check and to spot any new leaks or damage.
- Check the door closer and hinges. The door should swing shut and latch on its own. A door that hangs open even a crack will cost you cold air all day.
- Confirm nothing is icing up. Light frost on the evaporator is normal between defrost cycles; heavy ice build-up is not and points to a defrost or airflow problem.
Pro tip: date your gasket check
Door gaskets are the cheapest part of a walk-in and the one that fails most often, so do not wait for them to crack. Keep a simple log of when you last replaced each gasket, and budget to swap them on a schedule rather than only when they fail. A fresh gasket can cut energy waste right away, and it takes minutes to install. Treat it as routine, the same way you would change a filter, and you will avoid a lot of warm-air leaks.
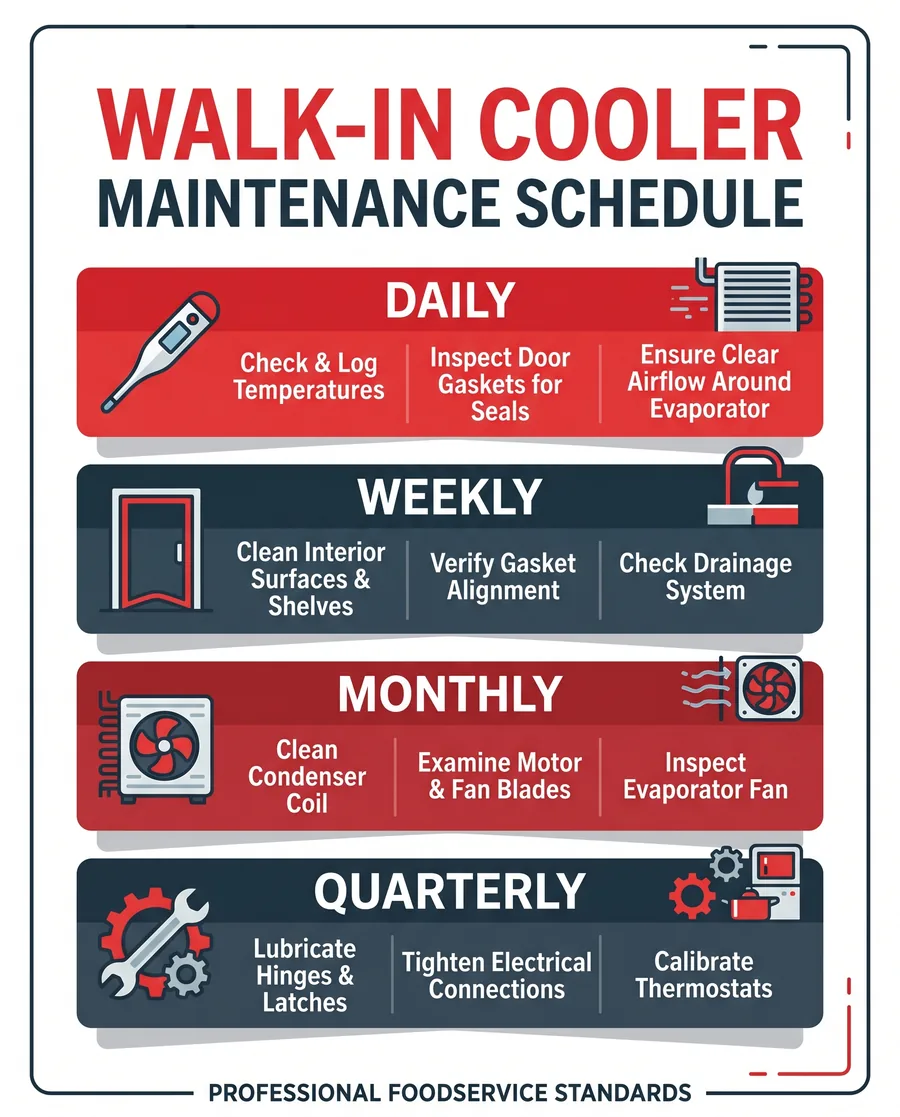
Monthly checks
Once a month, give the cooler a closer look. This is where you head off the expensive failures.
- Clean the condenser coil. With the power safely off, clear dust and grease from the condenser coil so the unit can shed heat. This is the single most valuable monthly task for efficiency and compressor life. If the coil is heavily fouled or hard to reach, have a technician handle it.
- Clean the evaporator coil and check the drain line. Make sure the condensate drain is clear so water does not back up and freeze inside the unit.
- Inspect the fan blades and motors. Listen for new noises or wobble. A failing fan motor strains the whole system.
- Verify the thermometer against a known-good one. Thermostats drift. Spot-check the display reading so you can trust your daily logs.
Quarterly and seasonal checks
A few times a year, bring in a refrigeration technician for the work that goes beyond cleaning. A modest service visit is far cheaper than an emergency call when the unit dies mid-service.
- Professional refrigeration service. Have a qualified technician check refrigerant levels, electrical connections, and the compressor. Refrigerant and electrical work must be done by a licensed pro, not in-house.
- Calibrate controls and defrost timers. Make sure defrost cycles run correctly so you avoid ice build-up without warming the box.
- Inspect insulation, panels, and the floor. Look for damaged panels or gaps that let warm air and moisture seep in.
- Plan for the seasons. Hot, humid summer months work refrigeration hard. Schedule a service visit before peak season so the cooler is in top shape when you need it most. Energy-efficient, ENERGY STAR rated refrigeration also rides out heat waves with less strain; you can check Canadian options through Natural Resources Canada.
Warning signs you should not ignore
Red flag: call a technician now
- The cooler cannot hold 4 C even though the door seals and the coils are clean.
- You see heavy ice build-up on the evaporator that comes back fast after you clear it.
- The compressor is short-cycling, running constantly, or making new grinding or buzzing noises.
- There is water pooling inside or a drain that keeps backing up.
- You smell something burning or electrical near the unit. Shut it down and get help.
Any of these means the cooler needs more than a checklist. Move your stock to backup refrigeration if you can, and call a refrigeration technician. If the unit is old and failing repeatedly, our commercial refrigerator buying guide can help you weigh repair against replacement.
Sources and further reading
- Canadian Food Inspection Agency – Food safety for industry (temperature control guidance).
- ENERGY STAR – Commercial food service equipment.
- Natural Resources Canada – ENERGY STAR Canada.
- Canada Food Equipment, in-house commercial refrigeration maintenance experience.
Frequently asked questions
Download the free quick guide
Print our daily, weekly, monthly, and quarterly walk-in cooler maintenance checklist and post it by the unit.
The quick recap
- Check the temperature and the door seal every day, and log it.
- Clean gaskets and interior weekly; clean the condenser coil and drain monthly.
- Book a professional refrigeration service a few times a year, especially before summer.
- Treat ice build-up, short-cycling, or a cooler that cannot hold 4 C as a call-the-pro red flag.
- When repairs pile up, weigh them against a new, efficient unit.
Time to upgrade your refrigeration?
A good maintenance routine keeps most walk-ins running for years. When yours has reached the end of the road, we can help you replace it. Browse our commercial refrigeration equipment and walk-in freezers, or contact our team for help choosing the right unit for your kitchen.